

|
Last updated:
3/4/08 - You aren't imagining things - yes, there has been an update. I've replaced all PNG screenshots with JPEGs. They're about half the file size, and after doing a comparison in Photoshop, there's no difference in quality between the two.
Previously:
3/15/07 - A mod for mods! How to build a simple audio mixer for your AtariVox and a modified 2600.
8/7/04 - If this isn't a modded 2600, I don't know what is! Check out the page I've set up about my Imagic kiosk!
7/2/04 - It never ends... I added test results for an adjusted CyberTech mod. Turns out the saturation was turned up too high. While this may not cause everyone a problem, it did on my TV, which I've detailed on this page. I'm also working at getting a modded 2600 from povlok1, and a 2600 Jr. to test, but that probably won't happen until August. Finally, I've added a page detailing my favorite joystick modification. Check it out - I think it works great!
7/1/04 - Clarified a few notes regarding contact cleaner, using a VCR to stabilize video, making audio mods, video artifacts on screen captures, and making an S-Video to composite adapter. Whew! (Thanks to Chris Wilkson, Dan Schmidt, Bohus Blahut, Sku-u.)
6/21/04 - Completely re-did everything: all of the tests, screen captures, results, etc. Added more pictures (as if the page didn't take long enough to load before), added CyberTech video mod info, added thumbnails for all screen captures and added more (hopefully useful) links. Removed references to the 7800, since I've decided to limit the scope of this page to the 2600. Created a logo for the page. Sorry, T-shirts are not available. ;)
6/1/03 - Had to remove 7800 RF adapter images, due to a lack of server space.
12/15/02 - Added audio noise notes to Test Results, added index, removed broken links.
12/15/02 - Added S-Video test results, removed 7800 switchbox images, omitted 2nd Midnight Magic images from tests, updated thumbnails, updated a bunch of text.
12/15/02 - Added note on stereo mod, updated S-Video notes.
12/14/02 - Added more info on color calibration, fixed some typos, added NTSC note.
12/13/02 - The site goes online.
S-Video to composite adapter results
This site has been set up for the sake of comparing the various video modifications that have been created for the Atari 2600. Whether that means just building them from schematics, or getting them in the form of a kit, the idea is to give people an idea of what's involved with them, and more to the point, how well each of them works.
Originally, I was hoping to create the elusive "how-to" guide, but that's really not practical. If you can solder and have a basic understanding of electronics, you can install one of these yourself. At the very least, you need to know how to solder. If you don't, you can usually find some tips online. You can get by with a pretty cheap, low-watt soldering iron from Radio Shack. Just be sure to practice on something you can live without, before going to work on your 2600.
I'm not trying to put down any of the people who have developed these mods. Some work better than others, some will suit some people's needs better than others. All of these mods are available online either as plans or for purchase. I haven't developed any of the mods on this site - they were all invented by other people. I'm just testing them out as impartially as possible.
Finding the parts for these may or may not be easy. Radio Shack carries precious few electronic components anymore. I ordered most of the components for the video driver and CD4050 mods through Nationwide Electronics, Inc. The circuit boards, terminals and connectors all came from Radio Shack. All parts for Ben Heckendorn's mod came from Radio Shack, so that's a plus. Electronix Express and Digi-Key also carry most of this stuff, although NEI was the only place that had the transistor used in the video driver mod. For wiring, I used some spare category 5 cable (very easy stuff to work with).
The CyberTech mod is available through Atari2600.com. You can purchase a kit to install yourself, or pay them to do it. I have no idea what the shipping costs for sending a 2600 back and forth would be. There are no online plans to build one of these yourself, and given the complexity of it, there are probably few who would want to make the attempt.
The Color Bar Generator cart (originally by VideoSoft) used in these tests is a copy that I ordered from Hozer video. All of the rest of the carts are from my own collection. Some of the games were chosen based on feedback in the AtariAge Hardware forum.
All of these mods are tested using NTSC consoles and video equipment. I don't have the facilities available to test any PAL consoles or games. Sorry about that.
I've tested the following video mods on both a six-switch and four-switch Atari 2600 (some of these are listed in the Atari 2600 FAQ). The Atari 2600 used for the screen captures is the six-switch model (it's actually a Sears Video Arcade, but it's always been "an Atari" to me). I didn't test any mods in an Atari 2600jr., since I don't own one. With the exception of the CyberTech mod (which comes pre-built), I built these based on plans freely available on the internet.
Chris
Cracknell's mod
(not pictured - just tie all of the luma/sync/chroma signals together)


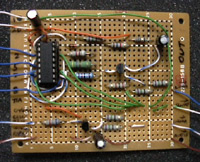
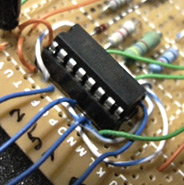
and the CD4050 mod without the CD4050 (as suggested by jsoper on the AtariAge hardware forum):
 ..
..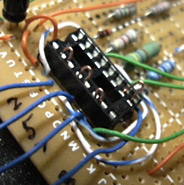
For this mod, I removed
the CD4050 (left), and used jumpers to bypass the connections
(right).
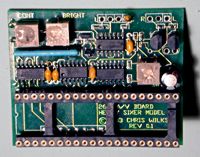
The CyberTech S-Video mod, created by Chris Wilkson:
The Atari 2600 was originally designed to output an RF modulated signal. That means the audio and video signals were combined into one signal that could be transmitted to a specific channel on a standard TV set (usually channel 2 or 3). This allowed the 2600 to be hooked up to any TV set at the time, but generated visible noise in the picture.
To show the difference between RF and the video mods, I also ran tests using RF through a standard switchbox and a straight adapter (similar to what AtariAge sells).
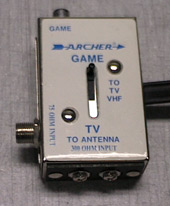
The dreaded switch box.
Dump it. If you can't dump it, blast some contact
cleaner in the switch.
 ..
..
A Female RCA to RF adapter (left) and an A/B switch (right) is
a much better solution.
Radio Shack even sells a remote-controlled switch, if you feel
like spending that much.
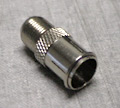
If you don't have an A/B switch, I'd suggest getting an RF push-on
adapter, to save wear and tear if you have to switch cables
a lot.
I also tried replacing the stock Atari RF cable (below, left) with a good, shielded RF cable. It didn't make any apparent difference, but your mileage may vary, depending on the condition of your original cable. You'll need an adapter like the one on the right to plug into the 2600's built-in RF modulator, but you'll need to file the center post down, since the original cable's is so much shorter.
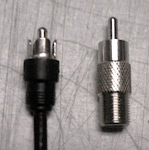
If you don't file the post
down to match the plug on the left, the adapter won't fit the
2600's jack.
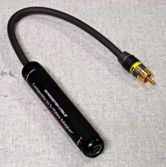
I also tested two S-video to composite adapters, for those who don't have an S-video input handy. The one on the left is from Monster Cable, and costs about $100, although they apparently don't make them anymore. That doesn't matter, since the one on the right costs about $5, and works just as well. There are also instructions on this page, for making your own adapter (although I haven't tested it, the principle is the same as the store-bought adapters).
 ..
..
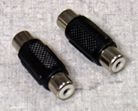
Something else you may want, is an RCA "Y" adapter. Most of the mods just have one channel of audio. If you're running it into a stereo TV, and want sound to come out of both channels, you'll need one of these (although the sound will still be mono).

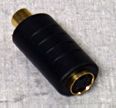
If you get the CyberTech S-Video mod, you may also want to pick up some female to female couplers. The cables included with that mod are very short, and these allow you to connect to longer cables.
 ..
..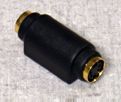
Couplers (aka barrel connectors)
for RCA
audio (left) and S-Video
(right).
Finally, if you need a something to switch between different game consoles, I highly recommend Pelican's System Selector. It's similar to most other switches you can find at TV stores, except it costs only $20 (most other switches are $30 - $40), it has five sets of inputs while most others only have four, and it has interchangeable nameplates for the inputs (except none that say "Atari"... for shame!).
 ..
..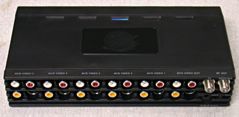
Pelican's System Selector
- front and back. It handles S-Video or Composite video, and can
pass cable through to your TV.
Except for the CyberTech mod, the better they work, the harder they are to build (although I'm sure Chris Wilkson worked hard enough designing the CyberTech mod). Ben Heckendorn's mod can probably be built by anyone with even minimal soldering skills. Tackling the CD4050 mod is going to tax your patience, unless you really, really, like to solder. Hand-wiring one of these is pretty tedious, and not for beginners. (It's not really that complex of a circuit - but if you don't have experience with soldering, it's going to be frustrating.)
I'm not going to describe how to get an Atari apart. If you can't get that far on your own, a video mod is probably not a good idea. The CyberTech mod comes with detailed instructions, but be sure to read them carefully - it's easy to overlook steps.
Each mod requires picking signals off of the TIA chip, and/or off the circuit board. There are schematics for each scratch-built mod available at the links above. If you decide to build a CD4050 mod, there's a diagram of S-Video pin-outs available here.
For the CyberTech mod, it uses an intermediate socket to pull the signals off the TIA chip, so you don't have to solder anything to the 2600 itself. It also includes the necessary cables and wiring information. I've detailed my experience with the CyberTech mod on this page. (Alternately, you can pay extra to have Atari2600.com install the mod for you.)
This shows the layout of a six-switch board, and where to find the various connection points. The TIA is the large, socketed chip at the bottom. Close-ups are below.
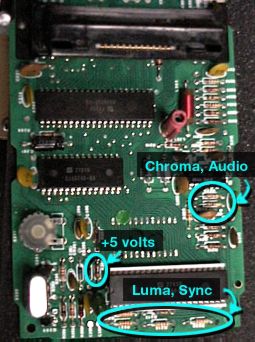
The cartridge slot is near
the top of this picture.
Close-up of the Audio and Chroma locations:
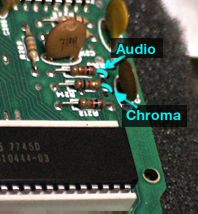
Attach to the leads highlighted
in blue.
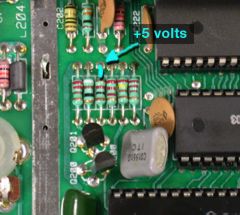
Close-up of the +5 volts location:

This ground is on the underside
of the circuit board. There's a nice, big area there to solder
onto, but any common ground will work.
Close-up of the Luma and Sync locations:

The numbers above are the
TIA pins, which the mods will refer to.
This shows the layout of a four-switch board, and where to find the various connection points. The TIA is the large, socketed chip at the bottom. Close-ups are below.
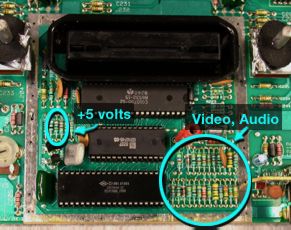
The cartridge slot is near
the top of this picture.
Close-up of the various signal locations:
Ground can be attached
at any common ground location.
Close-up of the +5 volts location:
Not all mods require power,
but here it is in case you need it.
Audio:
The 2600 was originally designed to have two built-in speakers, and supposedly stereo sound (now you know what those round vents are for in the top). Even though that was abandoned, Rob Mitchell pointed out to me that you can separate out the two audio channels on TIA pins 12 and 13, and get "stereo" audio (although originally games weren't designed to take advantage of this, some recent homebrew carts like SynthCart and Skeleton do). However, for the scratch-built mods, this involves bending up those two pins on the TIA and soldering directly to them, which isn't something I wanted to do, so I just went with mono audio, which was easier. The CyberTech mod has stereo audio by default.
The most direct way to make an audio mod is to connect the Audio point shown in the above pictures to the center pin of an RCA connector, and then connect the 2600's ground to the RCA's outer sleeve. Alternately, you could just build the audio portion of the CD4050 mod, which is the same thing, with the addition of a capacitor as a filter.
RF looks terrible on some games, not as bad on others. RF through an adapter looks a little better than with a switchbox. The noise that a switchbox picks up can be terrible, although some contact cleaner can help. Replacing it with an adapter (and a decent A/B switch from Radio Shack) reduces noise and image artifacts, and is the simplest upgrade you can make.
Composite video, whether through an adapter or straight from a mod, suffers from dot crawl - fuzzy edges along some horizontal areas of the picture. Depending on how good your TV is, you may or may not be bothered by it. The only way around this is by using S-Video.
S-Video looks best, by far. The images are crisp and there's very little color bleeding. There's no dot crawl, and the images have clarity rivaling that of a computer.
I used a calibrated Sony professional monitor for all of the tests (a PVM-14M2U). For some tests, I had to run the signal through an S-VHS VCR in order to get a stable image. If the video signal is unstable, a VCR can stabilize the signal enough for the monitor to achieve proper sync. If you build a mod and it doesn't seem to be working, try running it through a VCR.
The picture below shows the setup I used for testing with the six-switch 2600. The circuit board is resting on top of the metal shield that's usually enclosing it. I put a foam pad under the board, so nothing would short. This allowed me to work on everything "right-side-up".
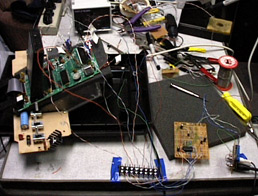
Somewhere in there, is
an Atari 2600...
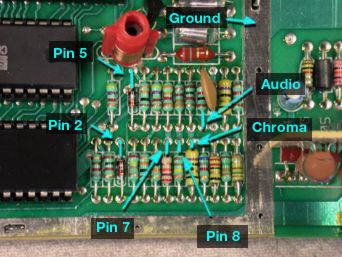
In order to not damage my 2600 I didn't solder anything to the circuit board. Rather, I used little copper clips (available from Radio Shack) to hook onto the ends of resistors. If you're building a mod for a permanent installation, you'll need to solder instead. But this is a good way to test everything before committing to it.
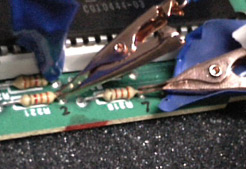
The blue stuff is electrical
tape, to keep the clips from contacting each other.
When permanently installing a mod, I'd suggest soldering to the resistor leads, instead of trying to solder directly to the TIA socket pins on the bottom of the board. For one thing, there's less chance of damaging the TIA, but perhaps more important - It's makes soldering easier, since you can hook the wires around the resistor leads before soldering them on. Since these are directly connected to the TIA pins, it makes no difference where you make the connection.
To speed up testing, I used a terminal strip to attach all of the necessary leads from the Atari 2600. These include luma outputs, sync, chroma, audio, ground and +5 volts. Then, I could just hook up each mod to the terminals, without having to connect new clips to the circuit board.

I also made a small video/audio interface board, with screw terminals on it, for the same purpose. That allowed me to always leave my audio/video connections hooked up, and just swap out the mods.
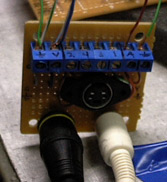
That's the S-Video connector
on top. Composite video and audio are below it.
The mods were tested with S-Video, if it worked. If not, composite video was used. As a reference, RF was also tested, since this is how the Atari was designed to output signals. (The first round of tests for this site were composite-only, because I couldn't get S-Video to work at the time. Since then, I've gotten it to work thanks to a little help from Rob Mitchell, and all current results reflect this.)
RF signals were routed through an S-VHS VCR, using its S-Video output. Chris Cracknell's mod and Ben Heckendorn's mod were also run through the S-VHS deck (using composite in and out), since the signal was too weak without it to get a stable signal. This depends largely on how forgiving your TV or video monitor is with unstable signals, so you may not require a VCR.
First, I let the system being tested warm up. I've found that the colors shift after awhile, if the unit has been left off. Then, I used the Color Bar Generator's title screen to calibrate the color using the big potentiometer on the main board - basing the adjustments on the instructions for that cart (which can be viewed at AtariAge).
"The color phase angles are generated by delaying the color signal until the desired phase angle is selected. An adjustment potentiometer is placed on the VCS console circuit board to adjust the 360 degree delay so that it is the same as 0 degrees. Although we do not recommend that you void any warranty on your game console, the potentiometer (the only one) can be adjusted so that the top half of the colored box is as close to the same color as the bottom half. The color generation circuits can then correctly produce colors from 0 to 360 degrees."
Six-switch color adjustment:
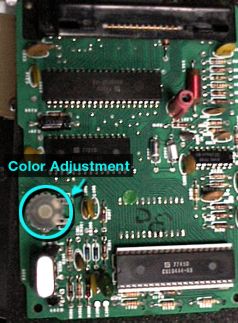
When adjusting this potentiometer, use a small screwdriver in
the center.
It's easier to make fine adjustments than if you just grabbed
it with your fingers.
Four-switch color adjustment:

You can also adjust these
through the hole located on the bottom side of the board.
I figured this would give the best idea of which video mod was interpreting the color signals most accurately. That way, I'm testing how each mod works, rather than using the 2600 to compensate for each mod, or adjusting the video monitor until it looks good. (Ben's mod required some additional back-and-forth adjustments, since his mod uses two potentiometers for adjustment. The CyberTech mod allows for adjustment of the picture, but it isn't required to get it to work.)
Once the color was calibrated to that reference, I'd test various carts, and recorded the signal onto a Sony DSR-25 DVCAM VTR. This is about the equivalent of digitizing using a DV converter, except it has better image quality than a consumer setup. I then did a direct FireWire transfer of the video into Final Cut Pro, so there was no signal loss from the digital tape. Finally, I used After Effects to pull individual frames from the captured video, and saved them as uncompressed PNGs. Even though DV does use compression for video, there were no noticeable artifacts from the compression present in any of these tests, since there was very little movement happening onscreen.
Below are the carts I tested, listing the still frames I've taken from the captured video. They've been left at 720x480, and interlaced, so it looks the way it does on an NTSC monitor. I've made notes of why I chose these particular screens for comparison.
| Game name / screen | Notes |
Picture |
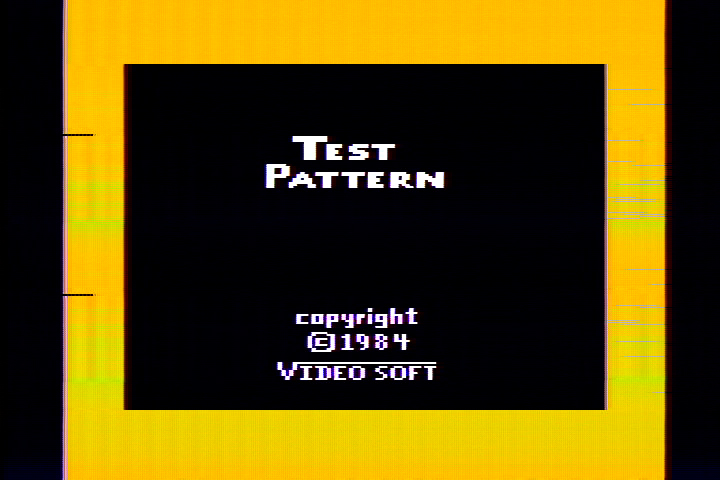
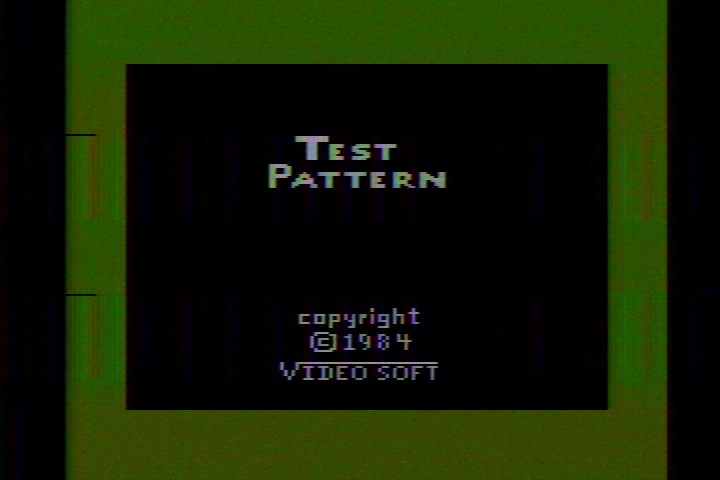
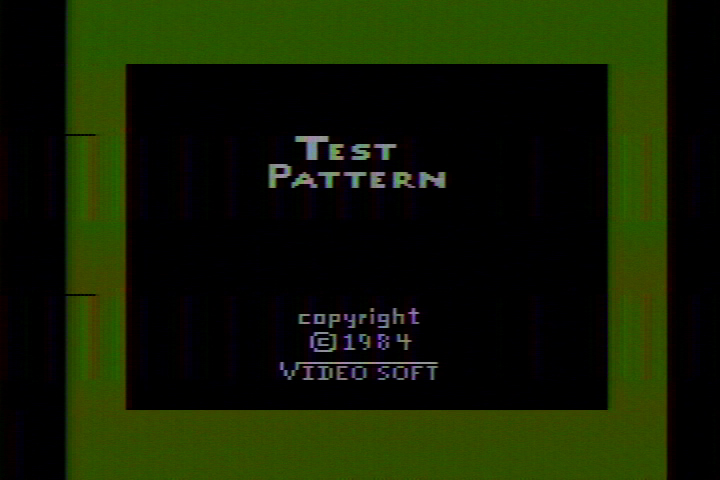
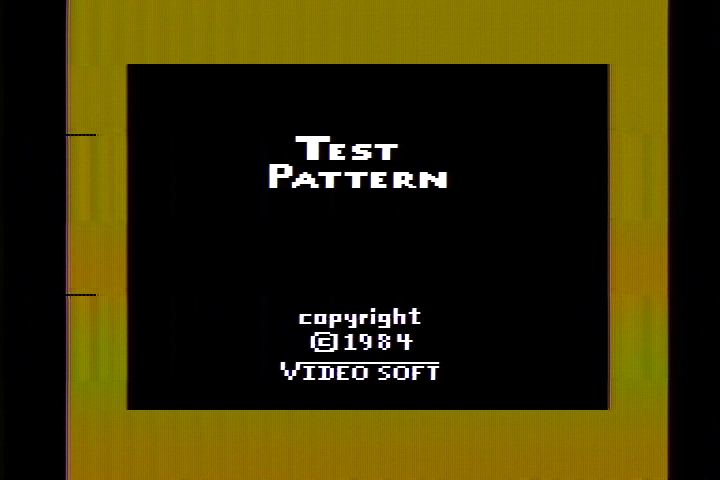
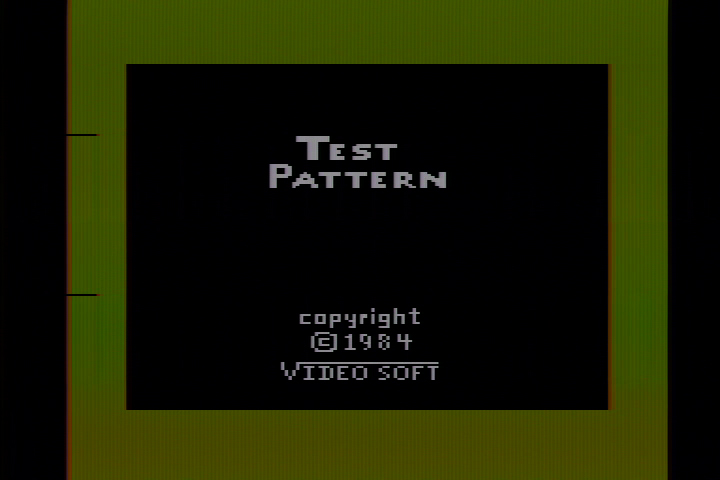
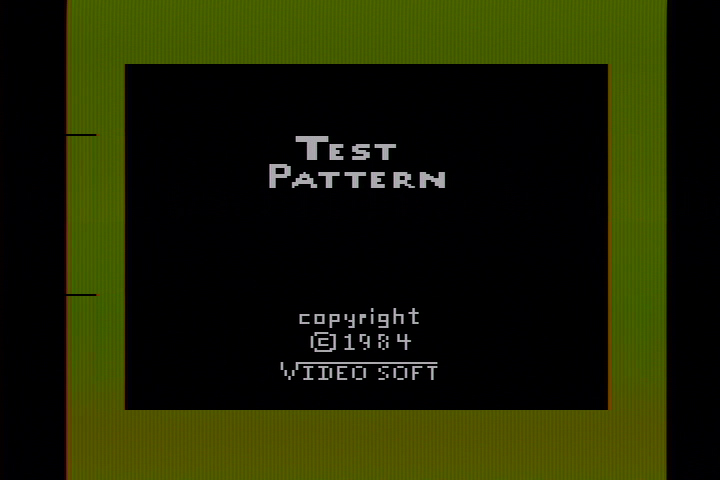
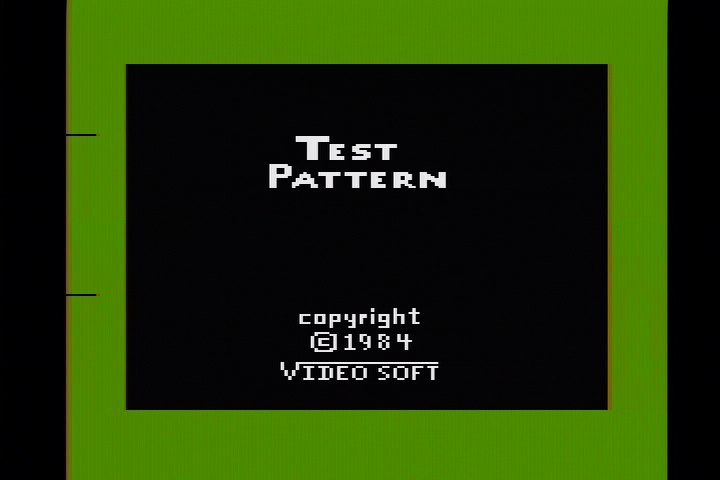
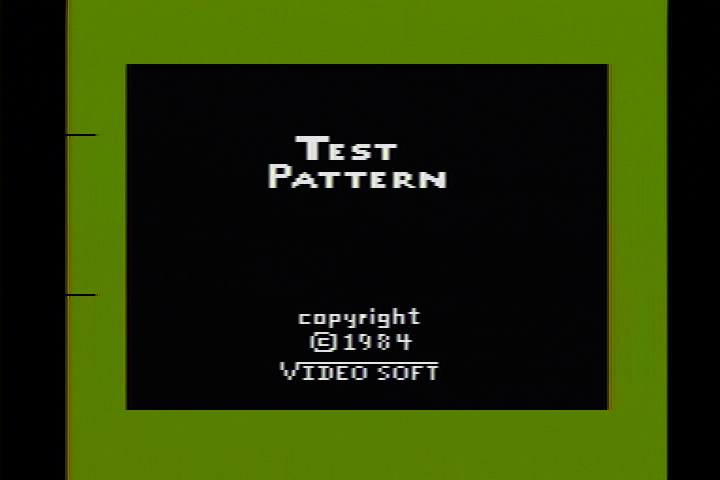
| Color
Bar Generator title screen |
Color phase calibration - the top and bottom of the greenish border should match |  |
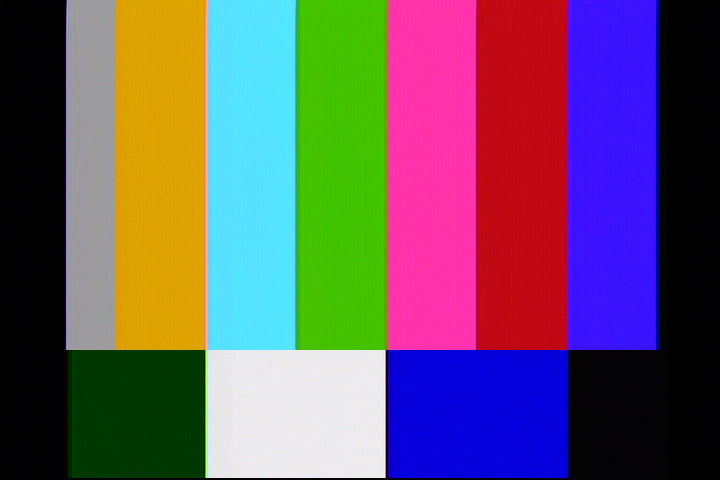
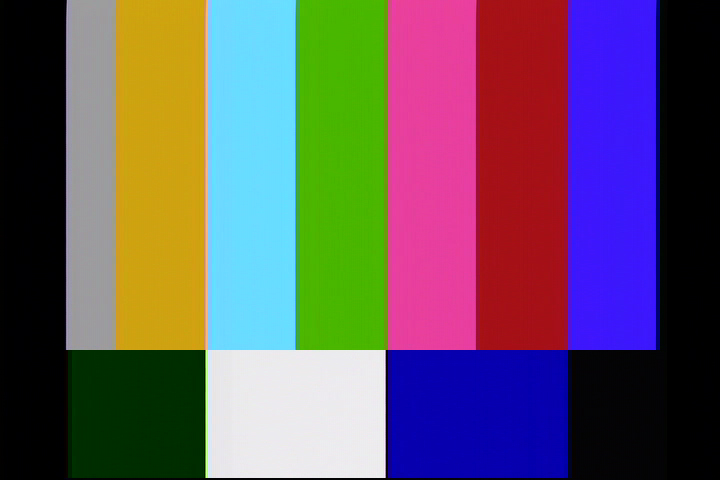
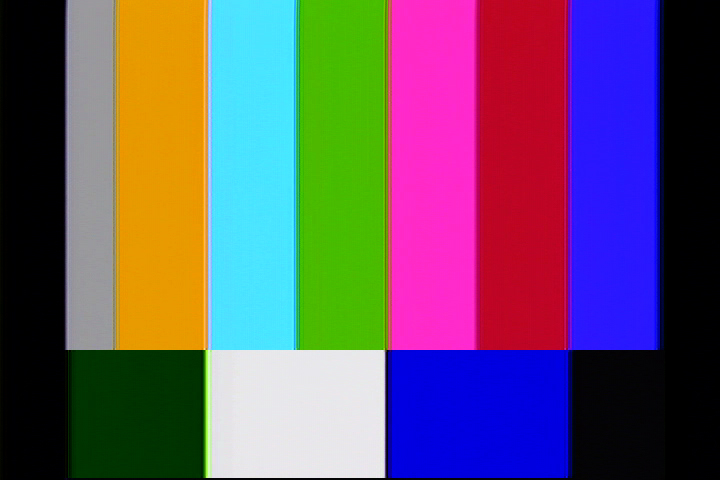
| Color
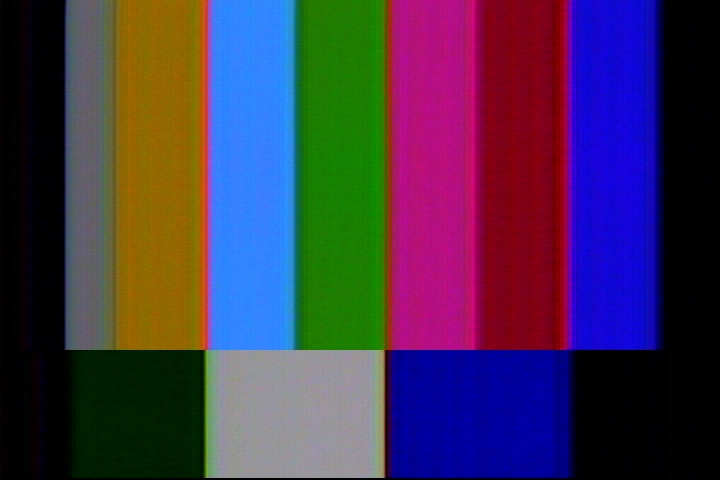
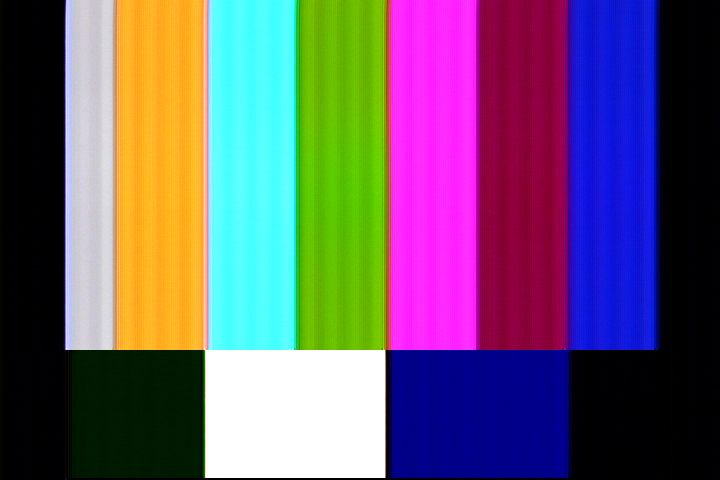
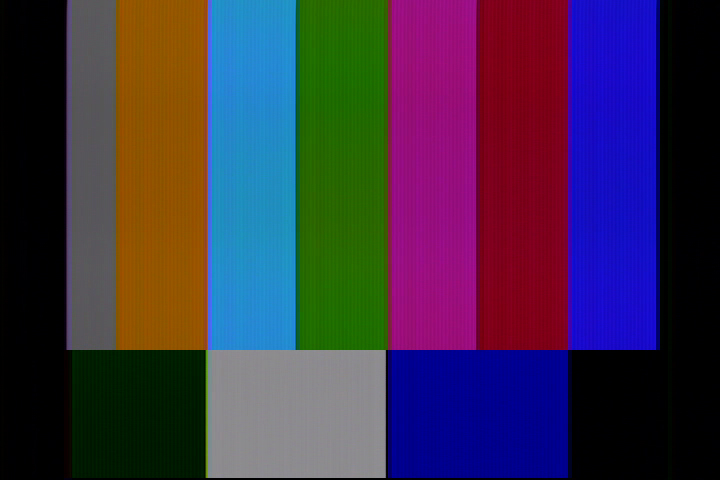
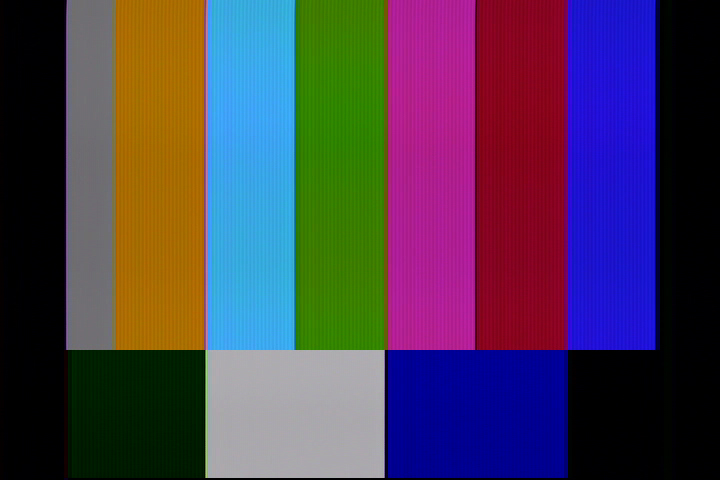
Bar Generator color bars |
The best reference for checking colors between the different mods |  |
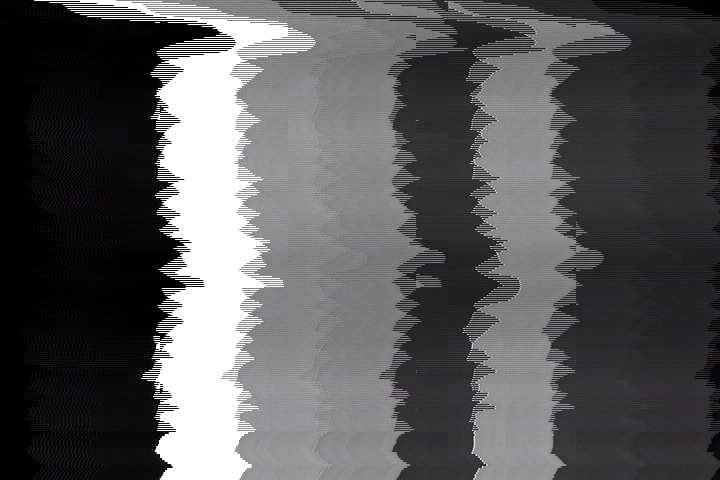
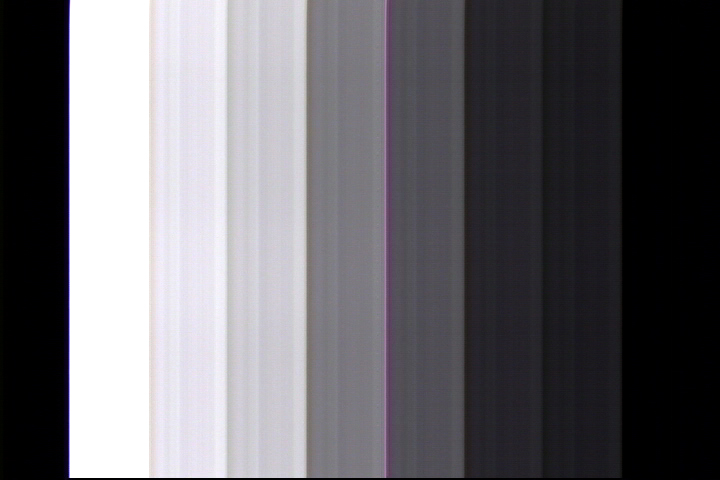
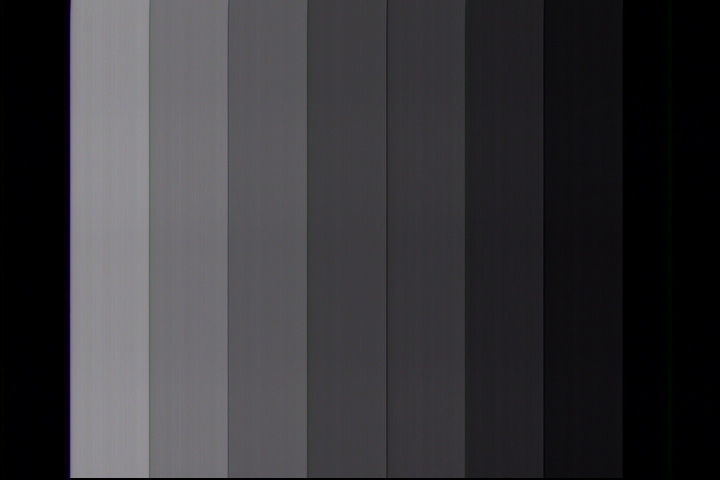
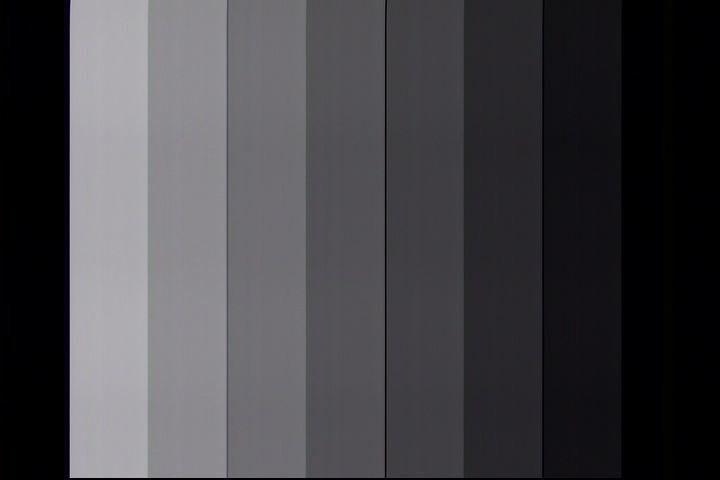
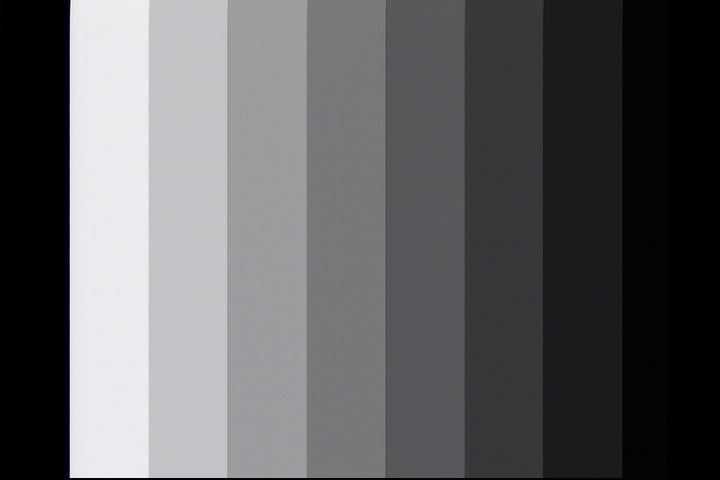
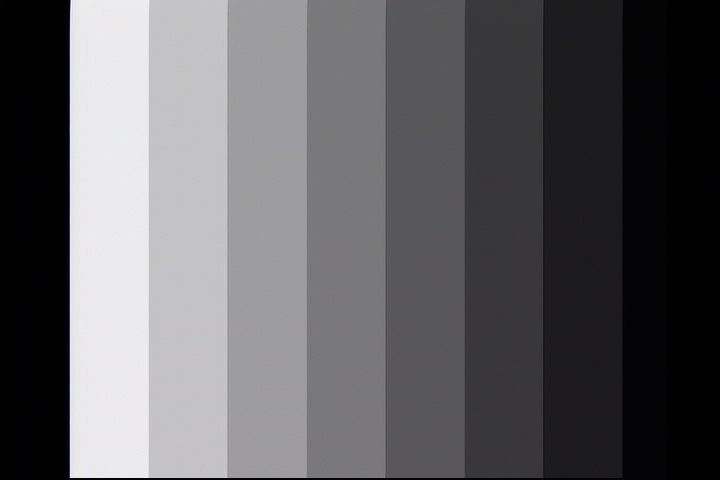
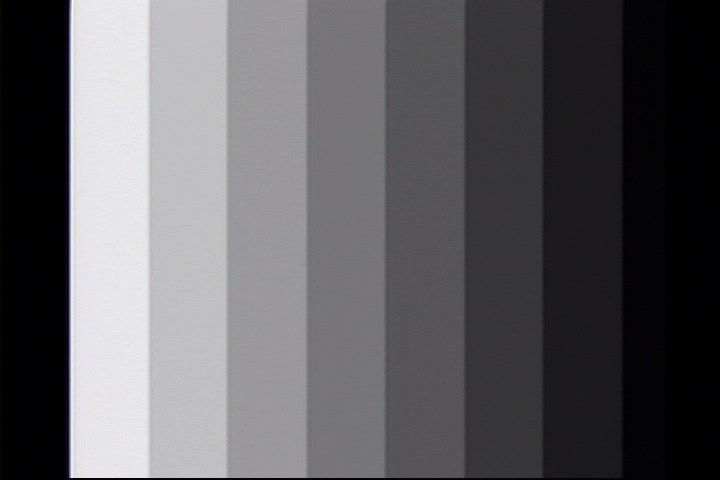
| Color
Bar Generator grayscale |
The best reference for checking luma differences |  |
| Color
Bar Generator crosshatch |
Picture geometry and convergence |  |
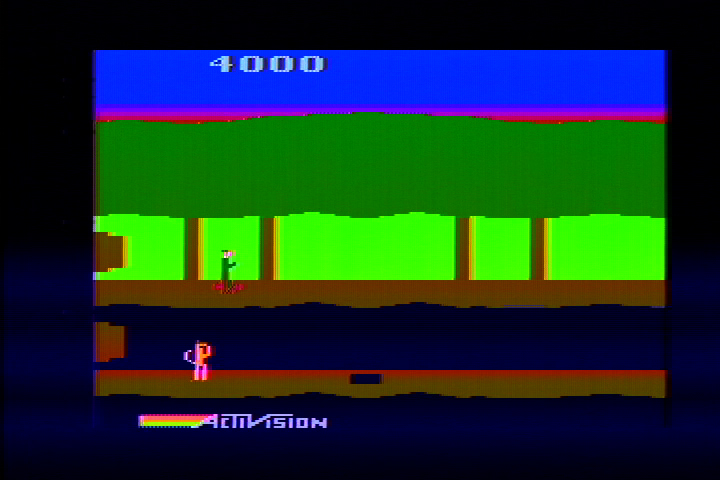
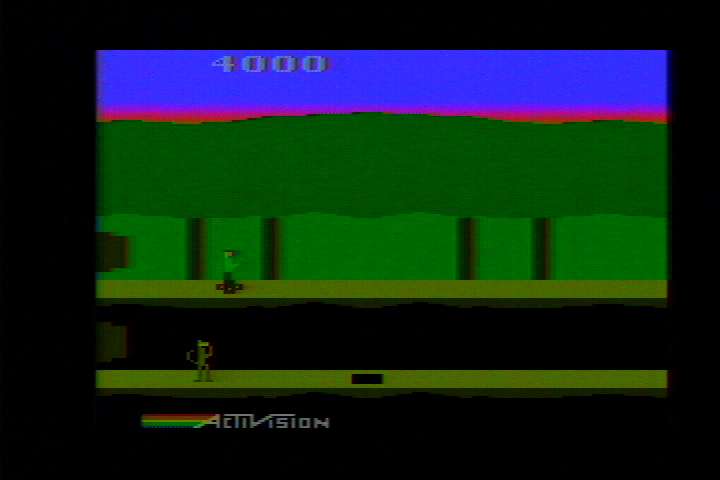
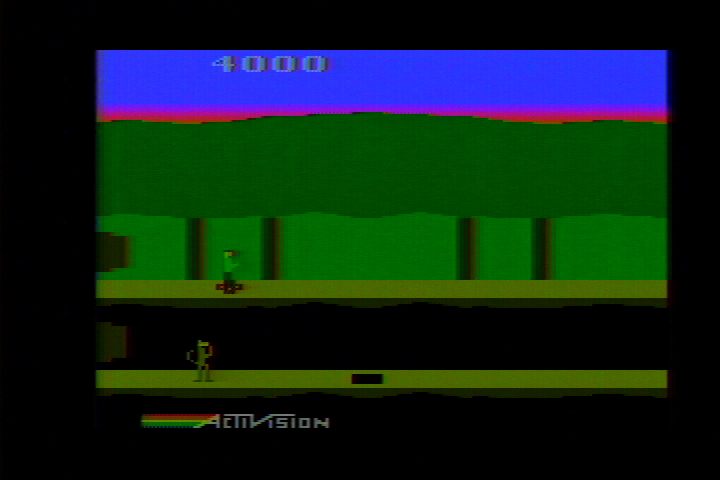
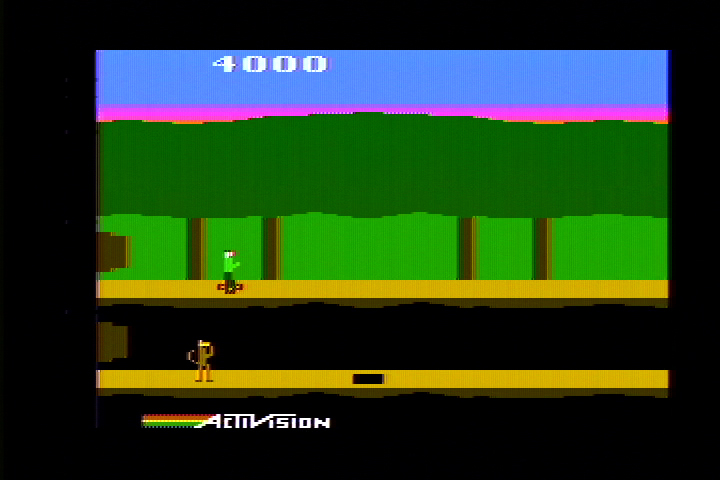
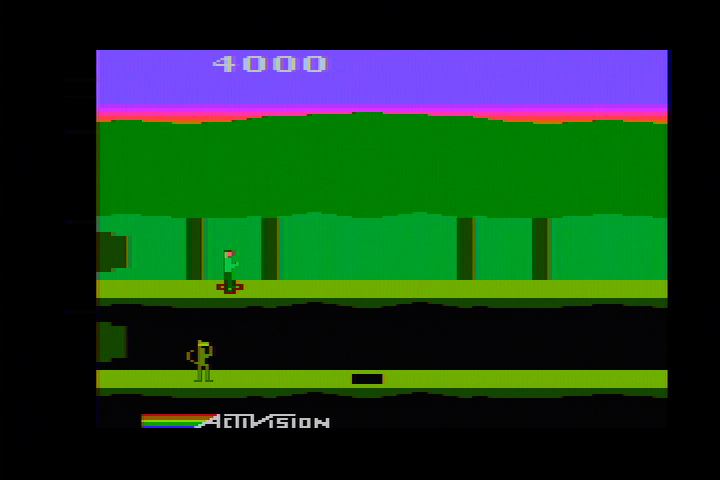
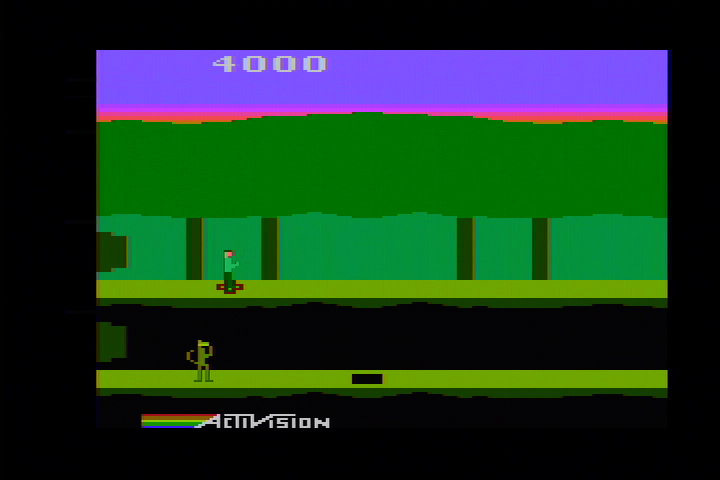
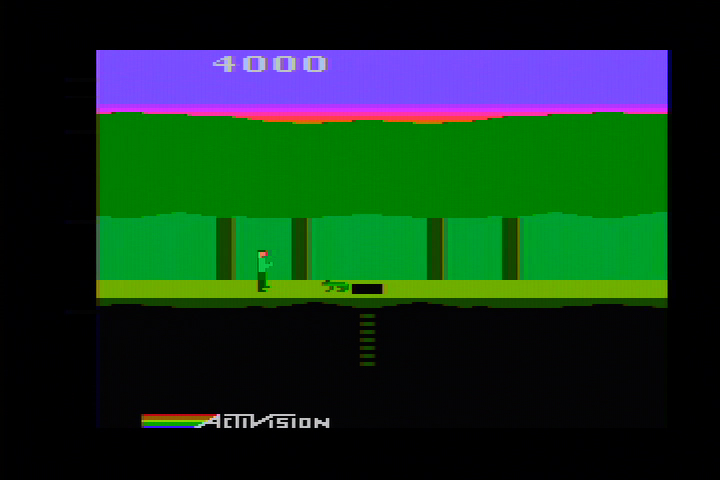
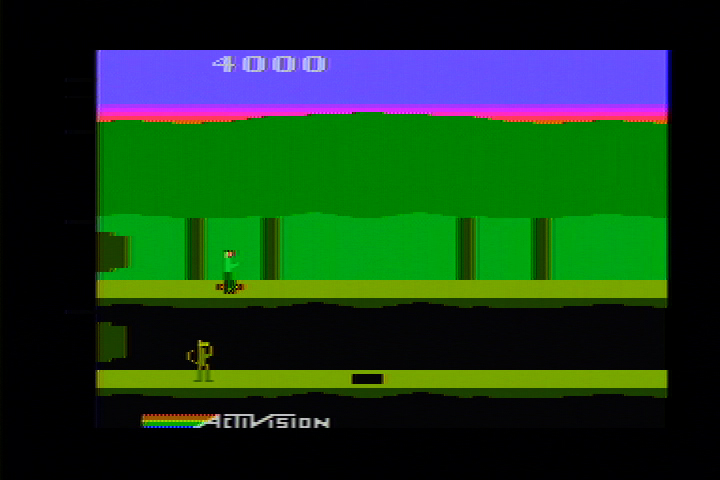
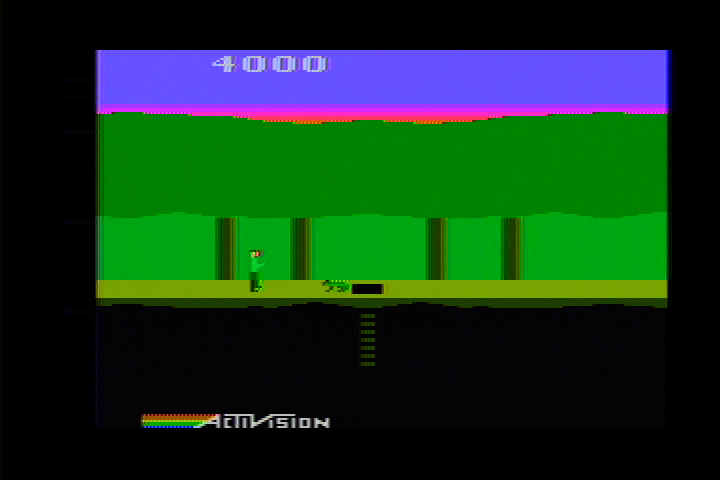
| Pitfall
II Starting screen |
Dot crawl on Activision logo and sunset, red cross bleeding into ground, ghosting along tree trunks |  |
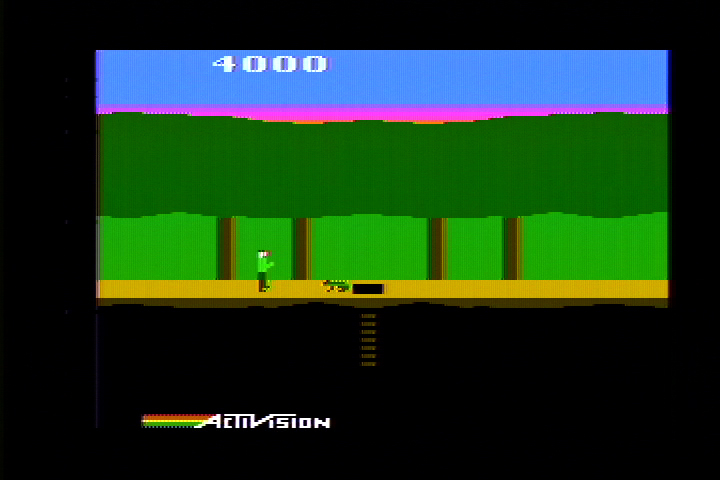
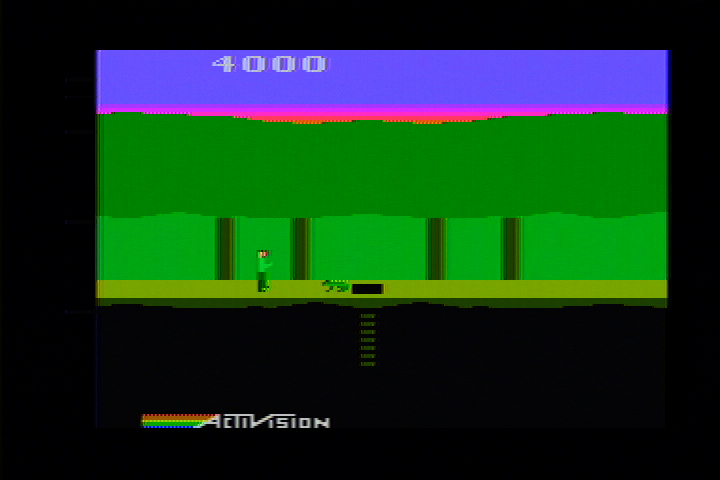
| Pitfall
II Frog |
Subtle differences in the various greens, dot crawl along frog's back |  |
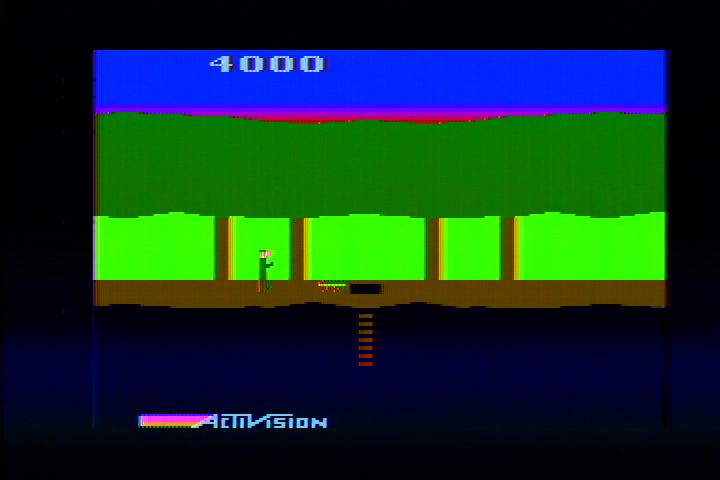
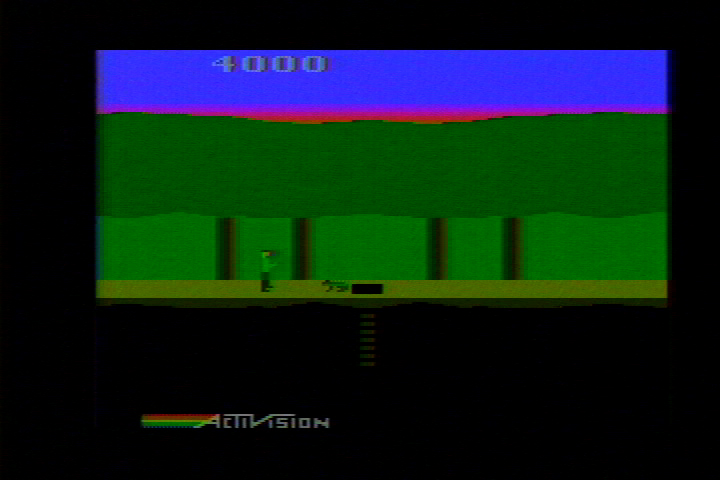
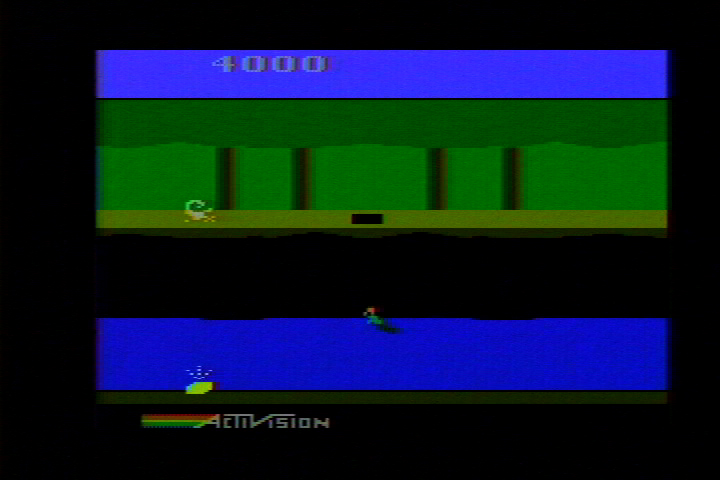
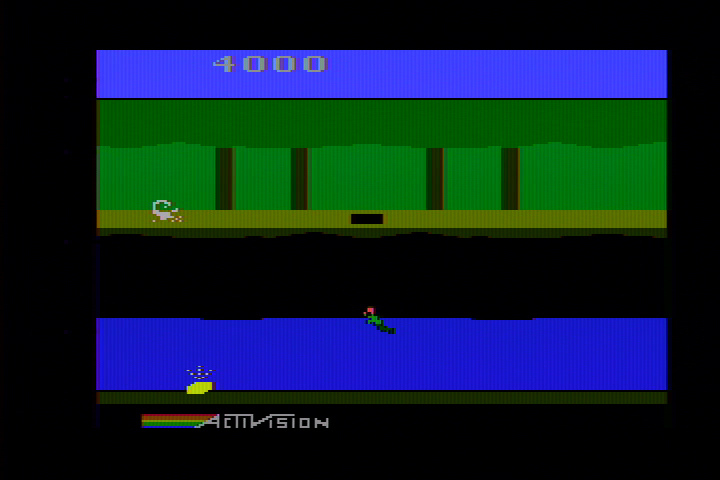
| Pitfall
II In the water |
Player sprite against intense blue water, dot crawl on scorpion |  |
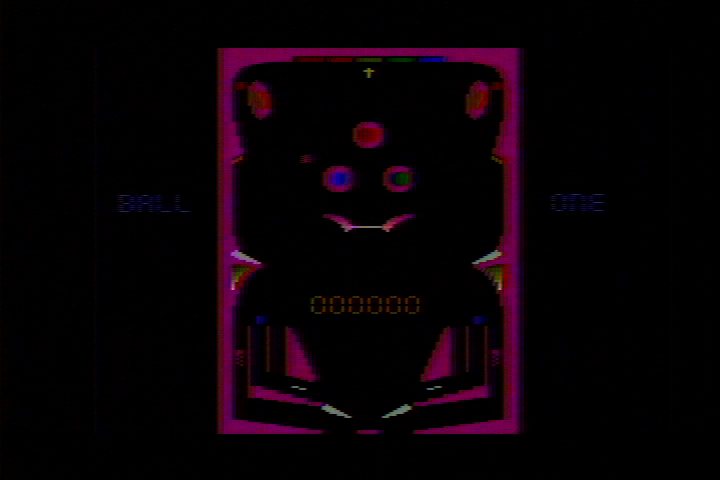
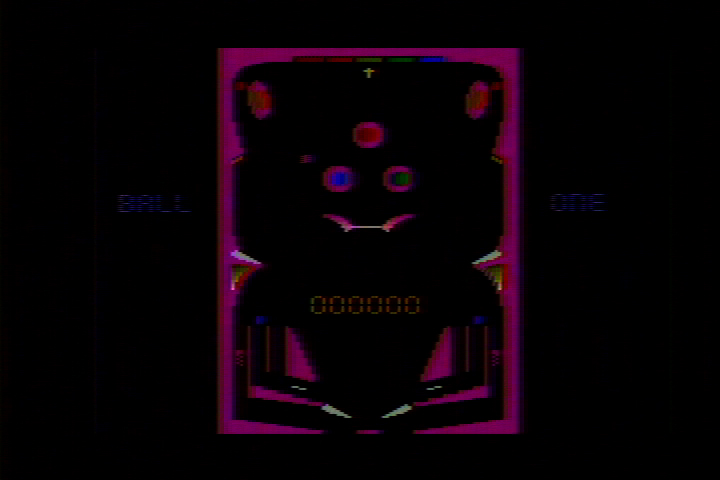
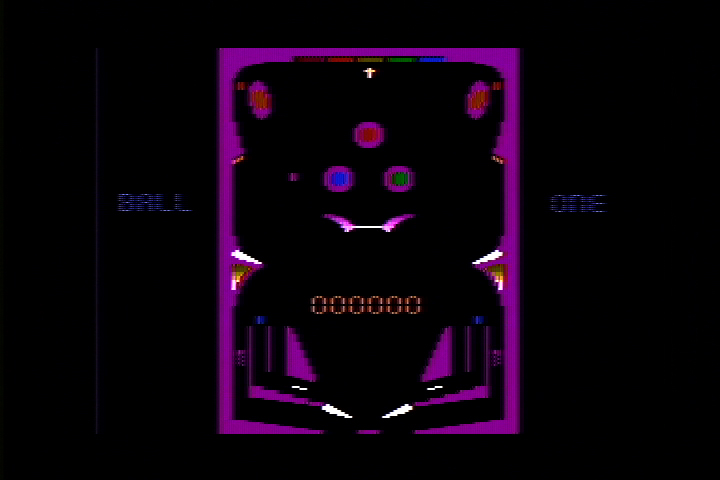
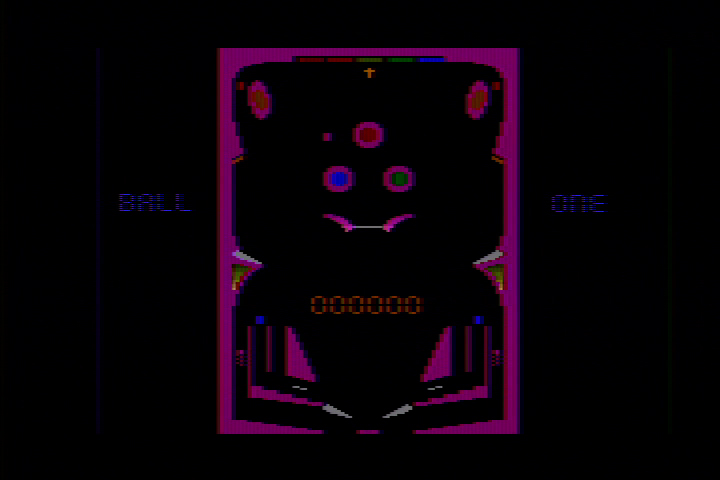
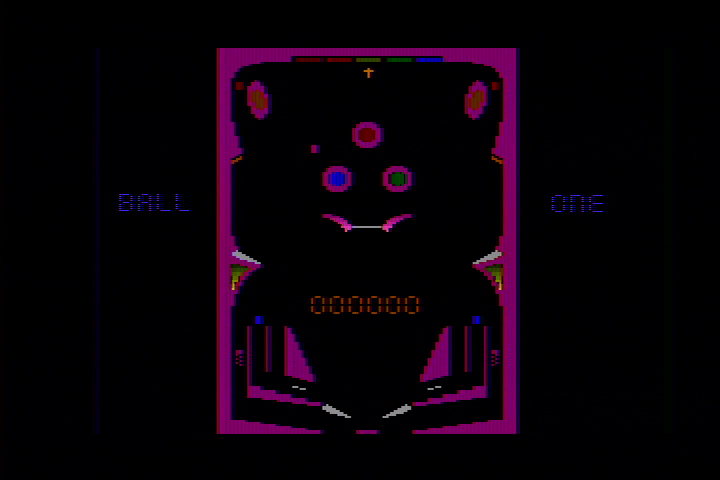
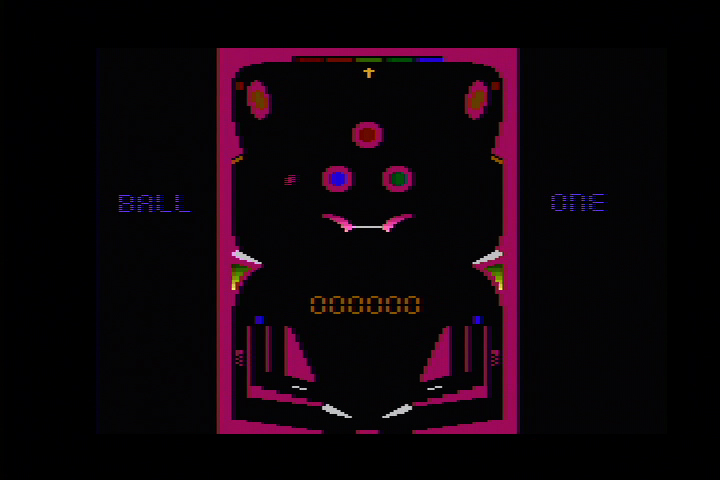
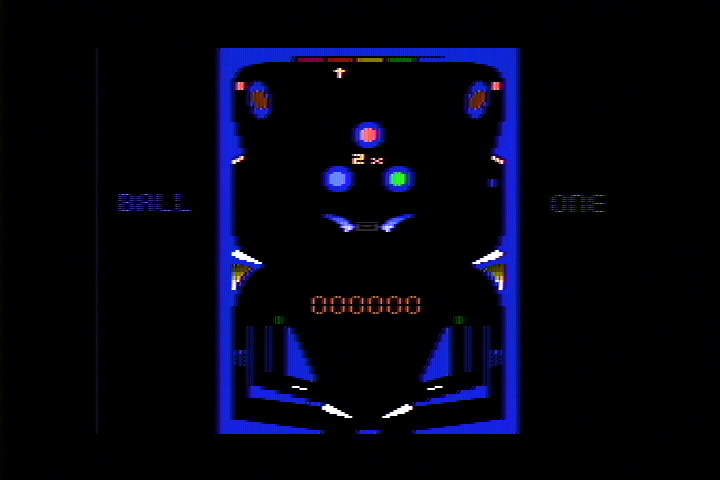
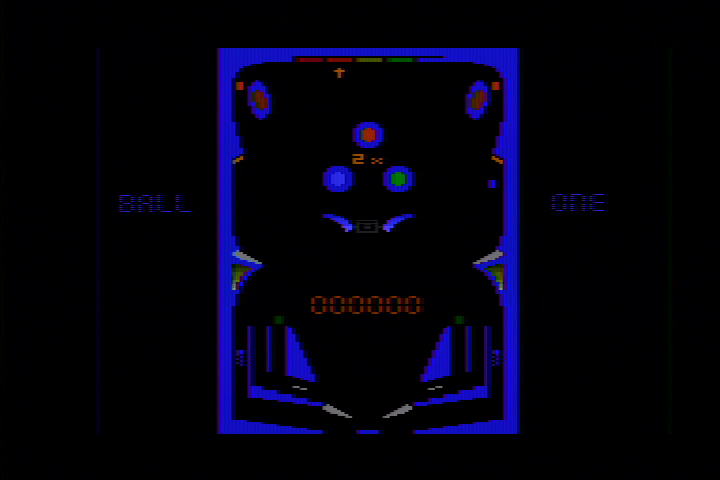
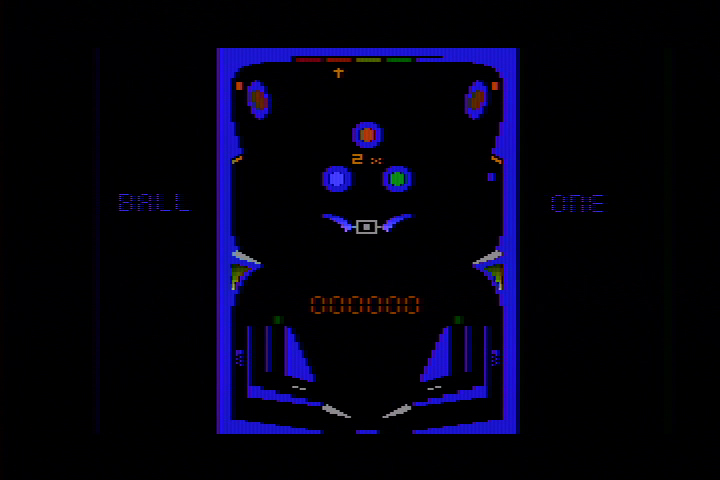
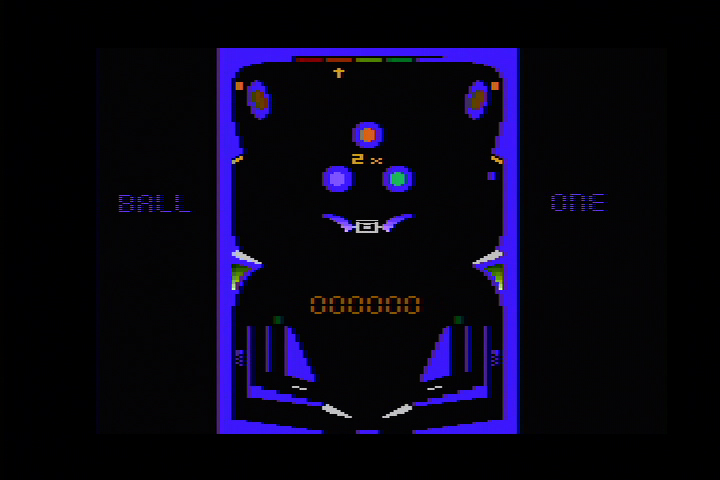
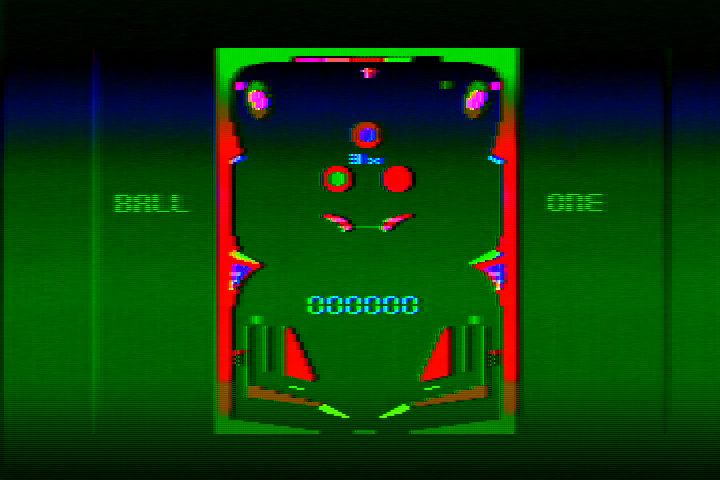
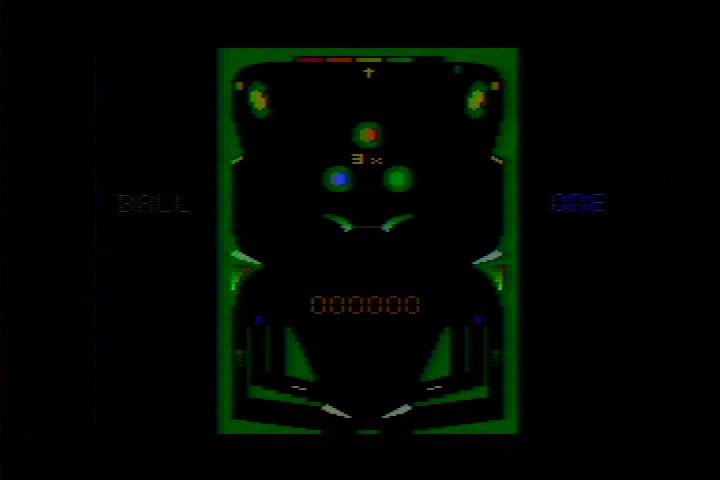
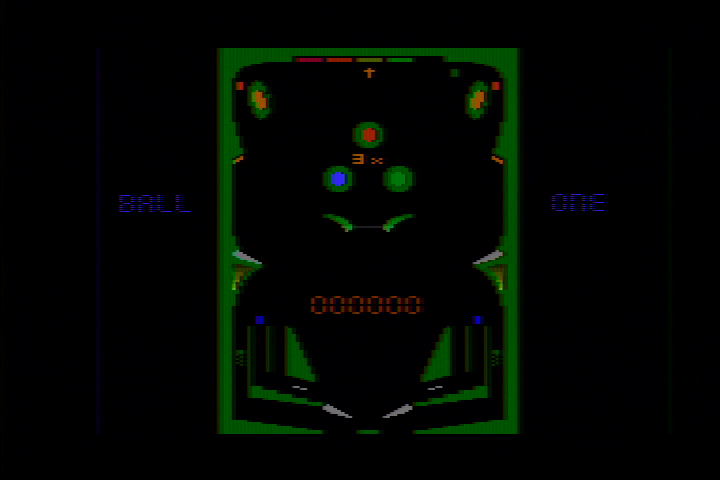
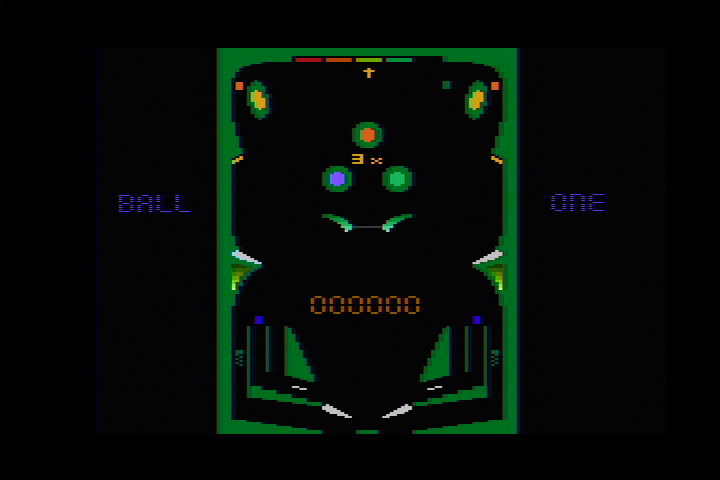
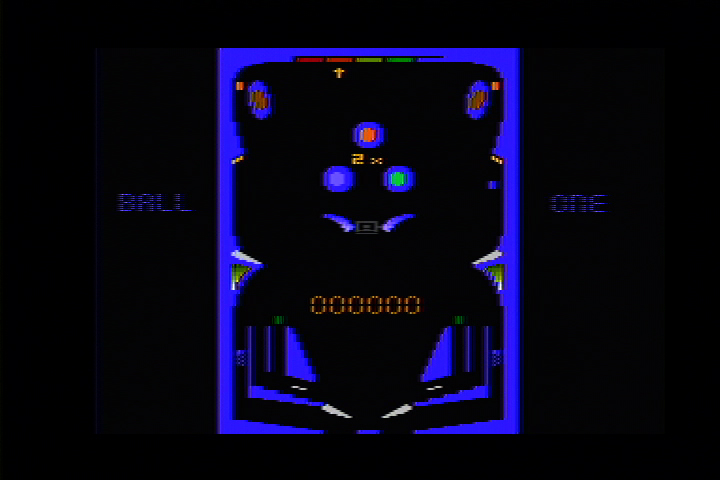
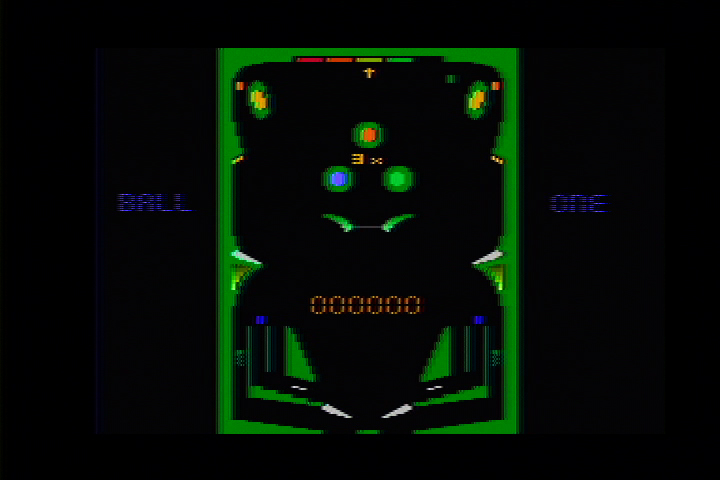
| Midnight
Magic demo mode 1x table |
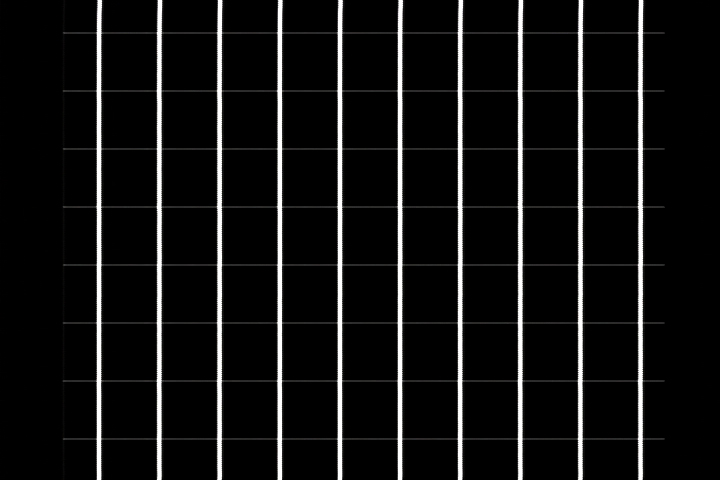
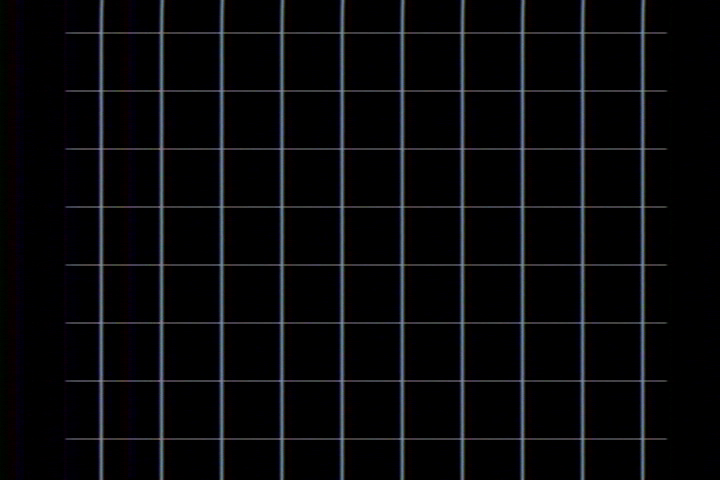
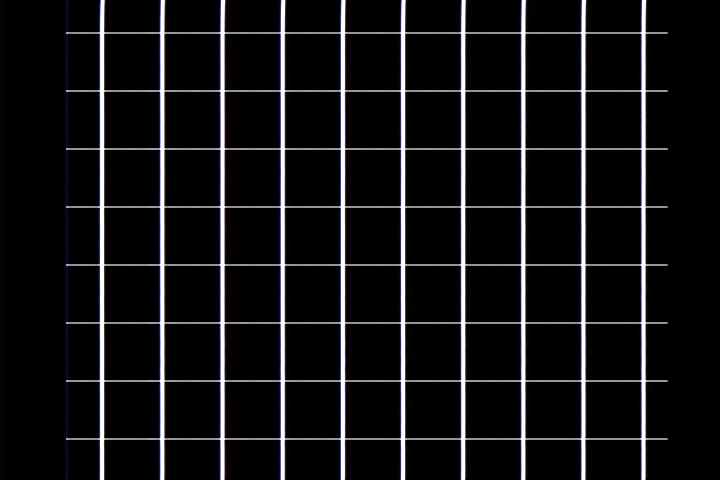
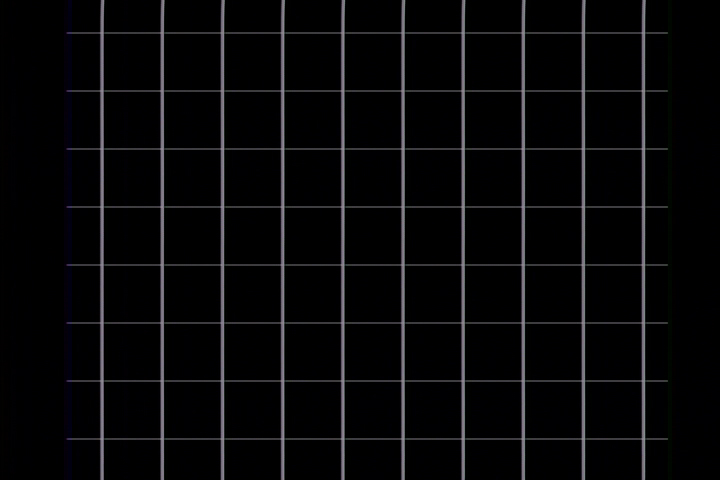
Color bleeding in the three large bumpers, thin vertical lines and fine details |  |
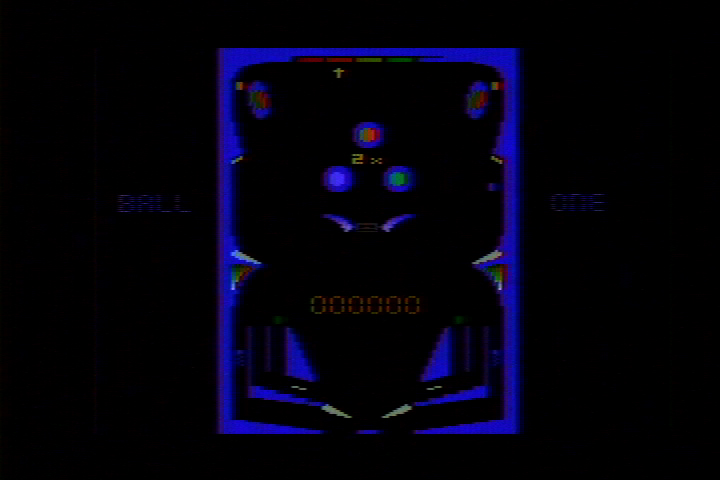
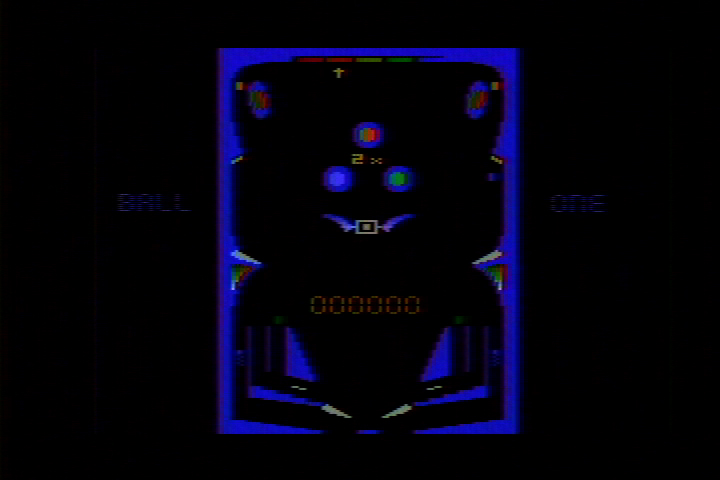
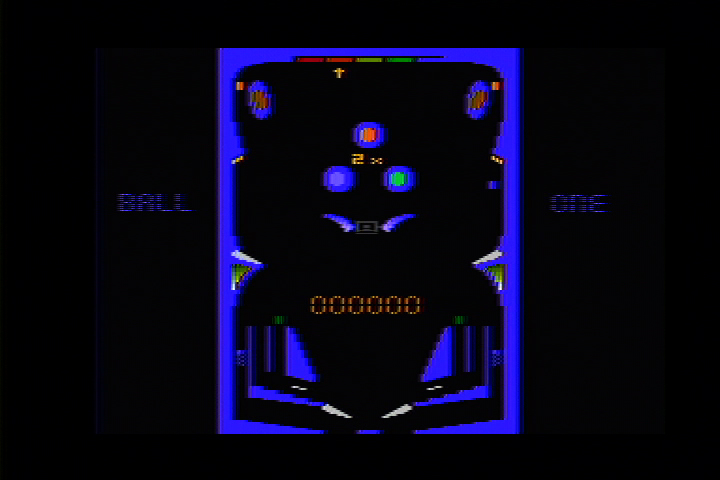
| Midnight
Magic demo mode 2x table |
Some ghosting along vertical blue lines |  |
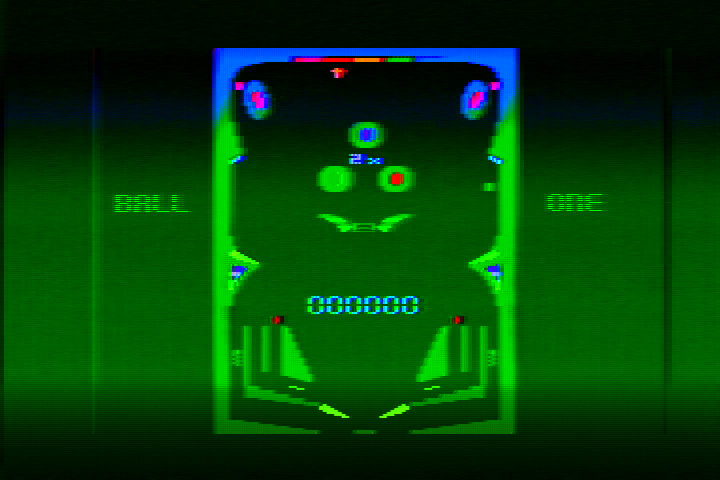
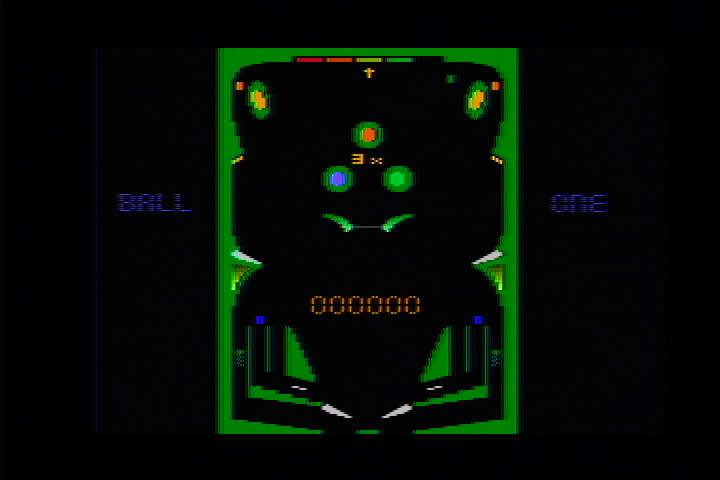
| Midnight
Magic demo mode 3x table |
Same as above, but with green table |  |
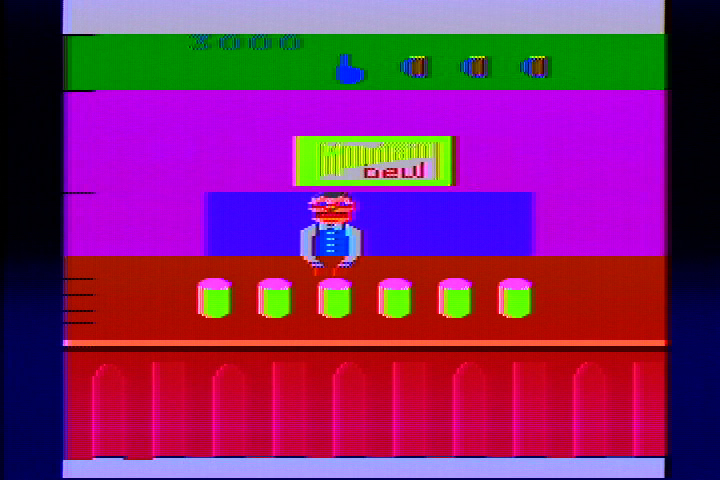
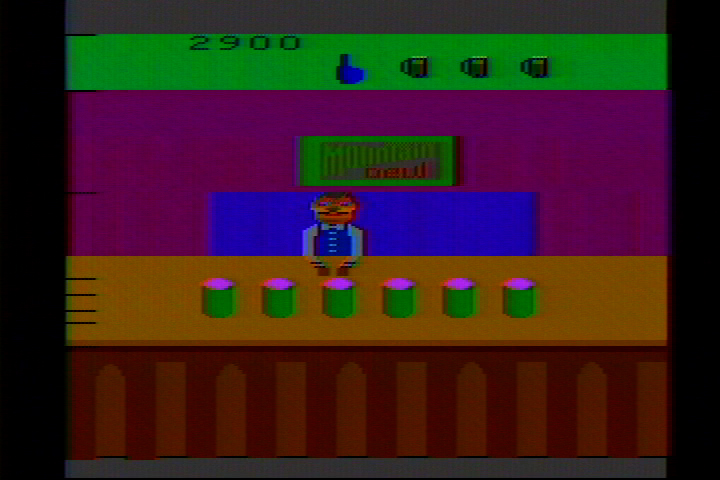
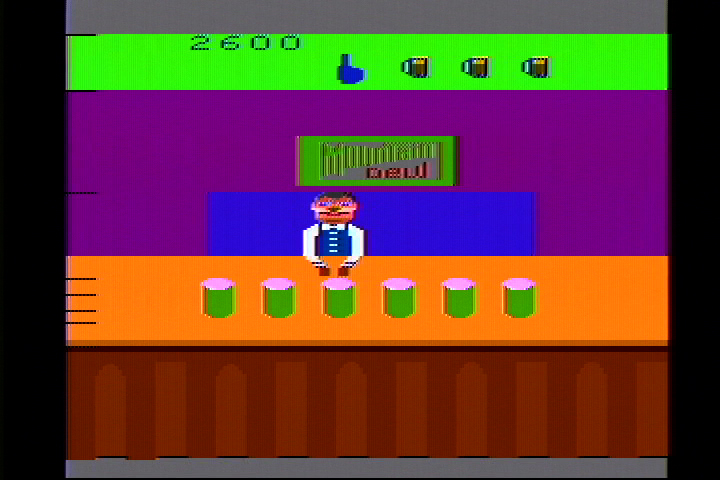
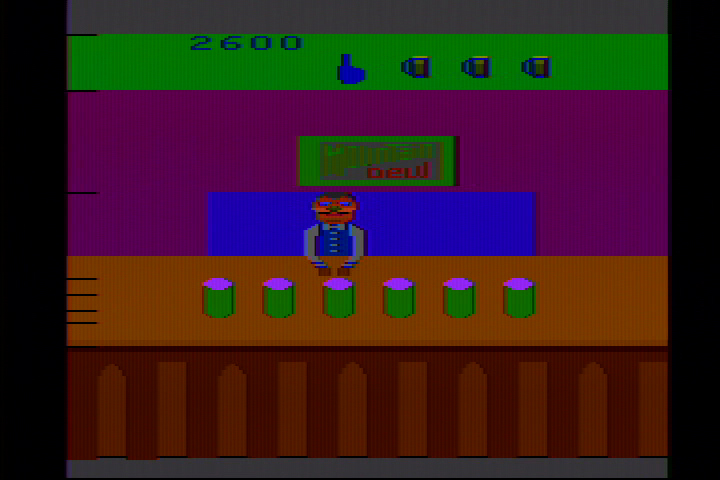
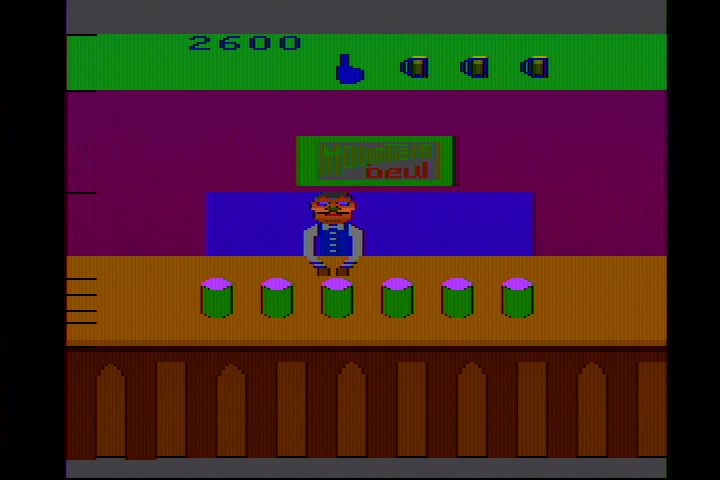
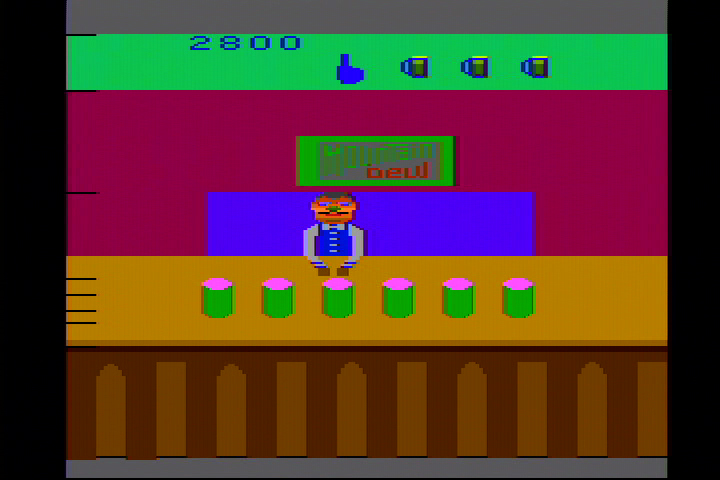
| Tapper "Soda Bandit" Bonus Round |
Fine detail in bartender, Mountain Dew sign varies in legibility |  |
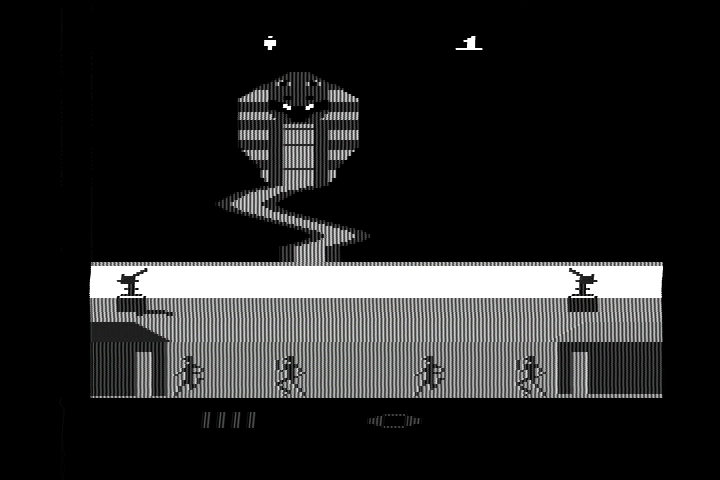
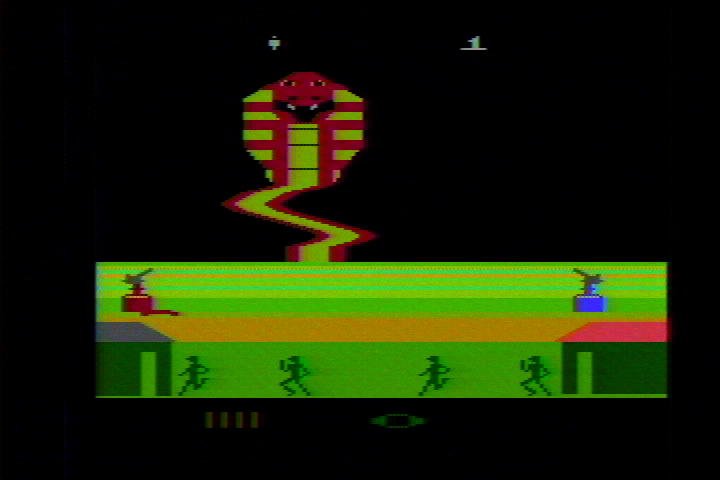
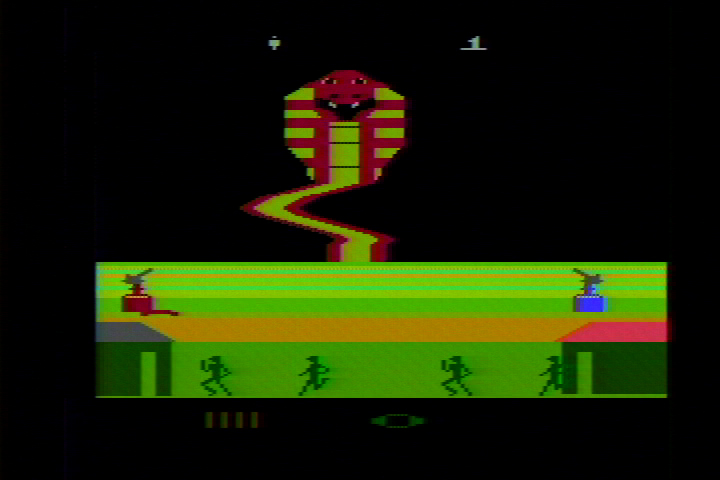
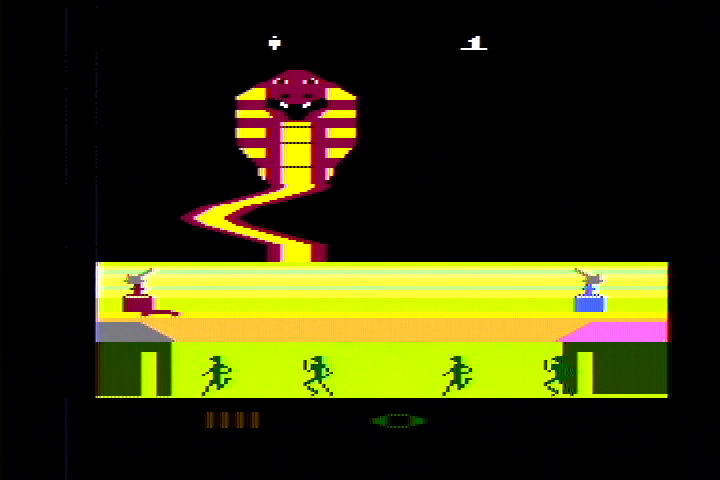
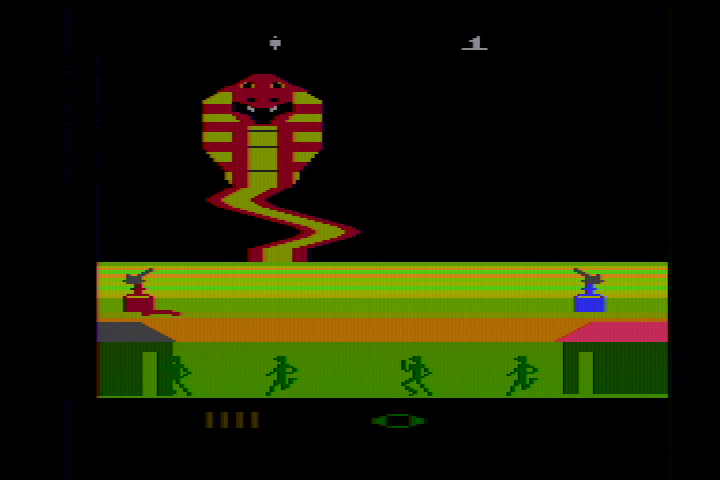
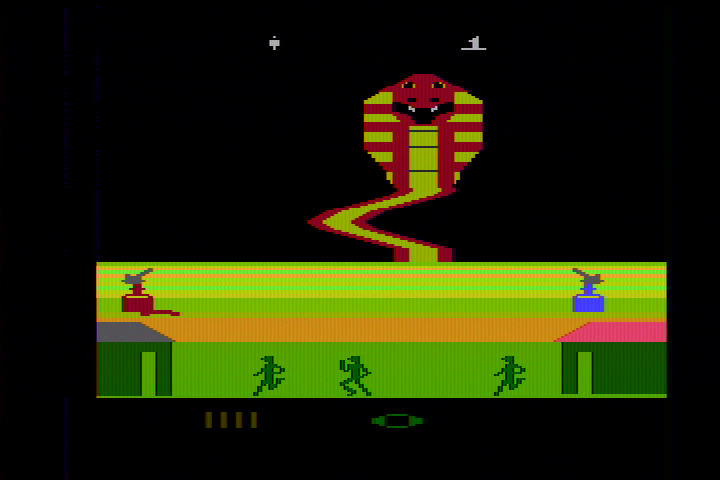
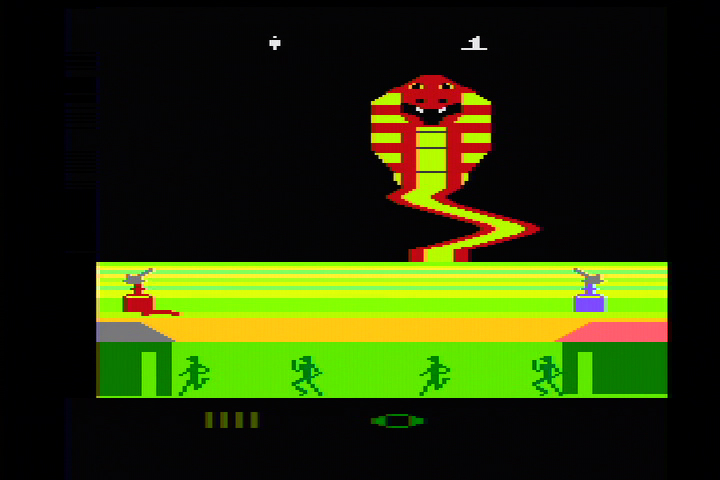
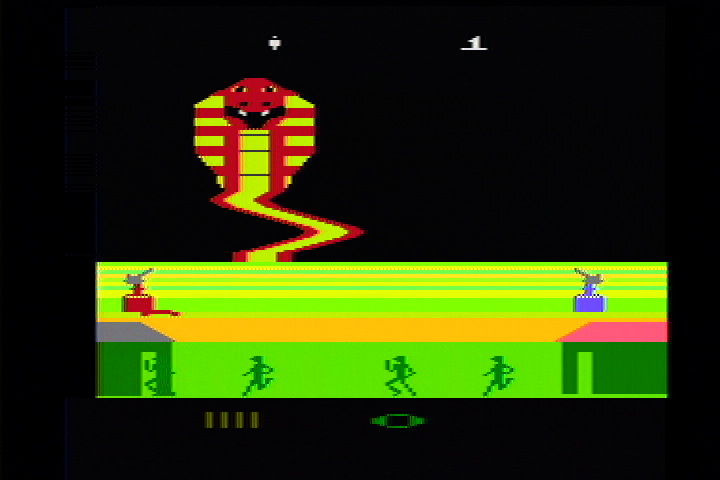
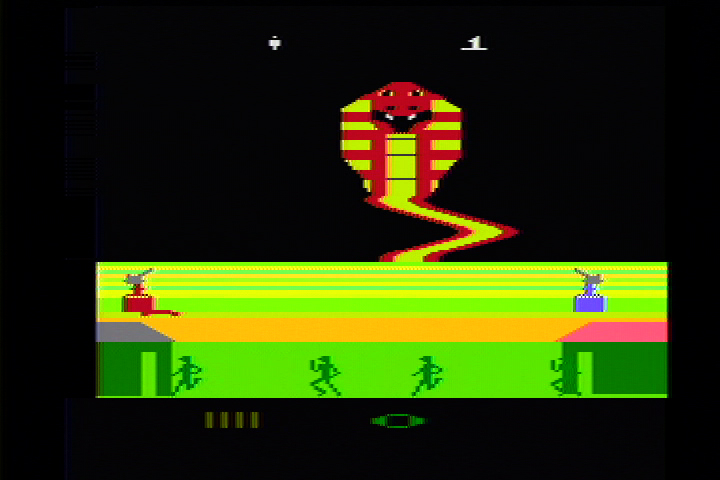
| GI
Joe level 1 |
Thin lines in background prone to dot crawl, fine detail, plus the Cobra looks really cool! |  |
Depending on your particular TV or video monitor, you may have better or worse results. Some monitors are more forgiving with unstable video signals than others. For a couple of the mods, I had to run them through a VCR to stabilize the signal.
There's some ghosting on the images (which appear as faint double images to the left or right), but all of the video mods and RF output exhibit this, and it's more likely something to do with the TIA itself, than something that can be eliminated. It's less noticeable on an NTSC monitor than it is in these screen captures.
The video driver - For the life of me, I couldn't get it to work on either 2600 or my 7800. I tried various connection points on the 2600s and 7800, double-checked the diagram, and even changed the circuit once to account for a possible ambiguity in the diagram. All I got was a brief "blink" on the NTSC monitor when I powered up, then black, so no test results are available. I'd be very interested in hearing from anyone who has gotten this to work, and could shed some light on the matter.
Chris Cracknell's mod - This is where everything is crunched together with no additional components. Without running it through a VCR, most games would start up very bright, then rapidly fade to almost nothing within seconds. On other games, the brightness fluctuated a lot, and the image was very unstable. Running it through a VCR helped, but some games lacked color, others had large areas of color flaring across the screen, and nothing was really what I would call acceptable.
RF video - The default video of the 2600, which you've been looking at for over 20 years. It doesn't look too bad, until you have something better to compare it with - then you start seeing how awful it really is. Indistinct shapes, soft edges, dull colors, and plenty of noise mar the picture. The plus side is that it's easy to hook up. A direct adapter gives a better picture than a switchbox, but unless you want to live without cable or satellite, you'll have to get some sort of switch for it. If you must use the old switchbox, hit it with some contact cleaner.
A note regarding contact cleaner: I've been told that Radio Shack's cleaner can gum up over time, so I'd avoid theirs. I've had good luck using this cleaner. Rubbing alcohol is another option. (Thanks to sku_u for the info.)
Ben Heckendorn's mod - For being so simple, it works remarkably well. Initially, the video was extremely unstable on my monitor, which resulted in a very dark and wobbly image. However, by running it through a VCR, the image stabilized, and the picture looked very good and quite bright. (Depending on your particular monitor, you may or may not need to run the signal through a VCR first.) The mod requires some tweaking of the two potentiometers on the mod and the one on the 2600 to get decent colors, which may be hard to do without a test cart. This mod didn't work at all with an S-Video connection - the image would distort to the point of being unrecognizable. Still, it has a good composite picture, it's easy and cheap to build, and may suit most people's needs just fine.
The CD4050 mod w/out the CD4050 - The exact same circuit as the CD4050 mod, but I removed the CD4050 from its socket, and put jumpers in its place. It worked nearly as well as the CD4050 circuit, but it was slightly darker (see next paragraph). You might consider this if you want a good picture, with a little less work than the CD4050 requires to build.
The CD4050 mod - Worked very well, and had the closest colors to the RF connection. Somewhat dimmer than Ben Heckendorn's or the CyberTech mod, but a very good S-Video picture. Takes about $20 in parts and a lot of effort to build, though. A good project for the do-it-yourself enthusiast.
The CyberTech mod - Easily the best of the bunch, and the one that now permanently resides in my six-switch 2600. It's the easiest mod to install (despite the issues I ran into), and produces a beautiful, clean, bright S-Video picture. The only downside to this mod is the cost - $59.95 plus shipping is pretty steep. But after the work I put into the CD4050, I found it worth the money. You can also have Atari2600.com install it in your 2600 for $84.95, but I don't think it's worth that kind of money. If you can't install it yourself, you'll be better off finding a friend or neighbor with a soldering iron. A couple of pluses are 1) it's completely reversible if you want to remove it and 2) it has "stereo" sound. Admittedly, stereo works better on some games than others, but it's a nice extra. (The 2600 has two sound channels, and one gets sent to each speaker, but it's not true "stereo" since the use of the channels tends to be arbitrary.) The CyberTech mod also allows you to adjust brightness, contrast and saturation. I discovered after the first round of tests that I needed to adjust the saturation, so there are two sets of test results shown below - the first set is from the mod as preset by the manufacturer, and the other set is after I adjusted it.
These are all maximum quality JPEG files, so there's almost no additional image compression beyond the DV compression used during capture. (For what it's worth - these are very accurate representations of what was on the NTSC monitor. I switched back and forth between a live image from the 2600 and the captured video to be sure I wasn't picking up unwanted artifacts.) They're listed approximately in order of increasing image quality, from least to highest.
The frame captures shown here tend to exaggerate some of the ghosting that happens in the picture (noticeable on the trees in Pitfall II, and on the vertical lines in Midnight Magic), in part because the computer can capture a much wider range of picture information than most NTSC monitors will display. Also, DV uses non-square pixels, which exaggerates the width of the images. While these color artifacts are still visible to a degree on a real 2600, they're far less noticeable on an NTSC monitor due to the limited color space, and the presence of scanlines.
Click on a thumbnail to view the full-sized image.
Some of these are large files, up to 200 KB. I'm just making a list of what's available, so you can open them for yourselves and compare what you wish.
| Game name / screen | Chris Cracknell's
mod (composite video) |
2600 RF (through switchbox) |
2600 RF (through adapter) |
Ben Heckendorn's
mod (composite video) |
CD4050 mod (w/out the CD4050) (S-Video) |
CD4050 mod (S-Video) |
CyberTech
mod (preset) (S-Video) |
CyberTech mod |
| Color
Bar Generator title screen |
 |
 |
 |
 |
 |
 |
 |
 |
| Color
Bar Generator color bars |
 |
 |
 |
 |
 |
 |
 |
 |
| Color
Bar Generator grayscale |
 |
 |
 |
 |
 |
 |
 |
 |
| Color
Bar Generator crosshatch |
 |
 |
 |
 |
 |
 |
 |
 |
| Pitfall
II Starting screen |
 |
 |
 |
 |
 |
 |
 |
 |
| Pitfall
II Frog |
 |
 |
 |
 |
 |
 |
 |
 |
| Pitfall
II In the water |
 |
 |
 |
 |
 |
 |
 |
 |
| Midnight
Magic demo mode 1x table |
 |
 |
 |
 |
 |
 |
 |
 |
| Midnight
Magic demo mode 2x table |
 |
 |
 |
 |
 |
 |
 |
 |
| Midnight
Magic demo mode 3x table |
 |
 |
 |
 |
 |
 |
 |
 |
| Tapper "Soda Bandit" Bonus Round |
 |
 |
 |
 |
 |
 |
 |
 |
| GI
Joe level 1 |
 |
 |
 |
 |
 |
 |
 |
 |
I used the preset CyberTech mod for these tests, running the S-Video out through each adapter. One was an adapter I bought at Roger's Systems Specialists for $5 (similar ones are available elsewhere), and the other was a $100 adapter from Monster Cable, which is apparently no longer manufactured. The point of this comparison is to show the difference between S-Video and composite video, and also that you don't need an expensive adapter to get the same results. (However, going from composite video to S-Video is an entirely different matter.)
I did not test the do-it-yourself adapter shown on this page. I'll try to add it in a future update.
| Game name / screen | $5 Adapter | Monster Cable Adapter |
| Color
Bar Generator title screen |
 |
 |
| Color
Bar Generator color bars |
 |
 |
| Color
Bar Generator grayscale |
 |
 |
| Color
Bar Generator crosshatch |
 |
 |
| Pitfall
II Starting screen |
 |
 |
| Pitfall
II Frog |
 |
 |
| Pitfall
II In the water |
 |
 |
| Midnight
Magic demo mode 1x table |
 |
 |
| Midnight
Magic demo mode 2x table |
 |
 |
| Midnight
Magic demo mode 3x table |
 |
 |
| Tapper "Soda Bandit" Bonus Round |
 |
 |
| GI
Joe level 1 |
 |
 |
As I have the time, and as I'm made aware of new mods or kits, I'll test them out and post the results here. Hopefully this will be of use to people. There's probably no single solution that applies to everyone, since everyone has different skill levels, budgets, and opinions. For my money, the CyberTech mod won out, although if I were on a tight budget, I would probably have been just fine with Ben Heckendorn's. Almost anything is better than the 2600's built-in RF.
If you have any feedback on this, or additional video mods you'd like me to add to this page, you can either post to the AtariAge Hardware forum, or e-mail me.
Thanks for stopping by!
![]()