|
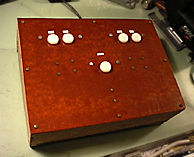
This is the first controller we built.
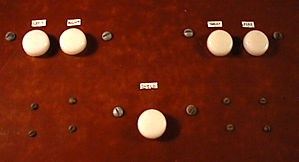
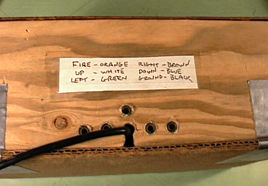
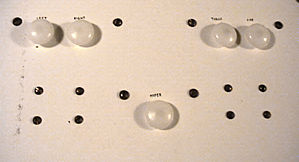
A close-up of the control panel. All of the screws really don't get in the way. Much. It's hard to read, but the hand-written labels say "Left, Right, Shield, Thrust, Fire".
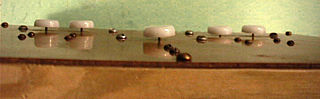
Here's a view from the edge. You can see that these really are chair glides. They have a brass post sticking out of them, which we put through a hole in a strip of brass, and soldered in place from the other side of the panel.
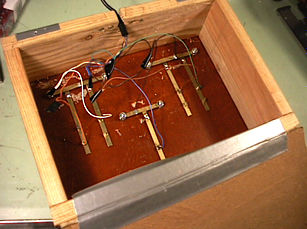
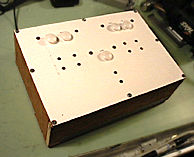
Here's a shot of the interior. Note the duct-tape hinge and cardboard bottom. Nothing but the best!
A shot of the back. Originally, we'd put together an all-custom wiring harness using a 9-pin connector from Radio Shack, and a bunch of single terminals that had to be plugged in one at a time. Then we wised up and just used a wiring harness from a busted 2600 joystick.
Here's the second one we built. It works almost as well. Except for one little problem...
We couldn't find the same chair glides! These are the right size...
But they're dome-shaped on top! Still, they work just as well. They feel kinda weird though.
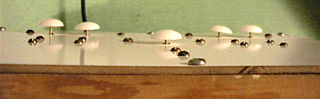
This is a close-up of how the switches work. The horizontal brass piece is common (ground), the two vertical pieces are (in this picture) right and left. The screws hold the vertical pieces flat to the underside of the top panel, so when you push a button down and release it, it springs back up. The horizontal (common) piece has a couple extra nuts on the other side that hold it away from the panel. When you push down on a button, contact is made and the switch is closed. When you let go, it springs back up and contact is broken. You can't get any simpler than that.
|