 ..
..
I've installed this mod in both a four-switch and six-switch 2600. If you have a choice - go with a four-switch. It's much easier, for reasons I'll get into.
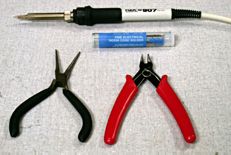
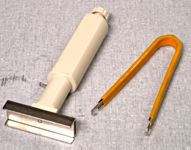
You'll need some tools. In addition to a phillips screwdriver to take the 2600 apart, you should have a soldering iron, some solder suitable for fine electronics work, needlenose pliers, and wire cutters. I also strongly recommend getting an IC puller and insertion tool (while not strictly necessary, I found them helpful).
..
The mod comes with complete instructions and all of the parts required, but I'll point out a few of the more crucial steps. (A few more illustrations on their instruction sheet would be helpful.)
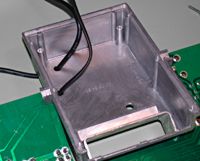
The first thing to do, before you do anything else, is feed the stripped ends of the wires in through the hole in the back of the 2600's case (where the RF cable came out) and through the two front most holes in the top of the metal shielding (if using a six-switch). This may seem trivial, but if you don't do it first, you'll have to desolder the whole thing later, since the connectors will not fit through the holes. This is something a number of people have run into on the AtariAge forums. I ended up having to enlarge the hole in the case so it was big enough for the connectors to go through. Be sure to feed the wires through in the right direction.
 ..
..
On a four-switch, you don't have to put the top half of the shield back on, so you only have to worry about the case. On a six-switch, the shield actually holds everything together, so you have no choice.
You'll have to solder eight wires to the circuit board (two of which are tied together). On the version I have, there was a capacitor sticking up from the board, and the chroma wire had to be soldered onto the end of it. Mine broke off the board, and I had to get a replacement capacitor. This has been fixed on recent versions of the mod, however.
The wiring is as follows:
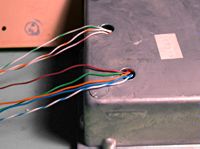
Audio: white = left, bare = ground, red = right
Video: red = chroma, white and black = ground, bare = ground, yellow = luma
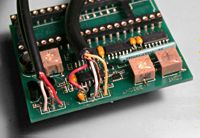
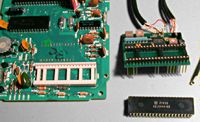
The wired mod. Yours may
appear different, but just follow the instructions and you should
be fine.
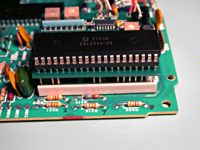
When I soldered these connections, I pushed the bare wire through the board as far as it would go, then bent it over on the other side so it stayed in place while I worked on it. Then I snipped off the excess. Once you get everything soldered, you have to pull the TIA chip from the socket on the 2600. For this I strongly recommend an IC puller (available at Radio Shack, among other places). Be sure to pull straight up until the chip comes out (it may take some effort). Try not to rock the chip, or you could bend the pins. If you do bend them - carefully bend them back.
The TIA chip removed. Be
sure to keep track of which way it was facing.
Now comes a potentially tricky part. Depending on your particular 2600, seating the mod into the TIA socket may take some effort. In fact, it may take a lot of effort. While there's plenty of room inside the sockets, the holes in the plastic may be too narrow for the pins of the mod to fit through. I couldn't get mine to fit, no matter how hard I pressed down, and I didn't want to risk snapping the 2600 circuit board in half.
My solution was to slightly file down the pins on the mod, so that they fit. From the bottom, the pins are diamond shaped. The problem isn't that they're too wide, but rather too thick. So I used a Dremel to just barely knock down the front and back corners. A fingernail file will do the trick just as well, but either way - only file off a little bit at a time until the mod fits. Don't risk cutting through the pins.
 ..
..
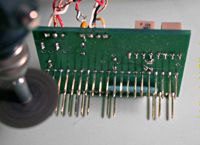
Be real careful if you
do this.
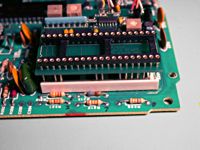
Once that was taken care of, I was able to install the mod, and reinstall the TIA into it. I used the IC insertion tool for this, since the pins on my TIA spring outward, and the tool presses them inward so you can easily insert the chip. The four-switch TIA chip didn't have this issue, so I didn't need to use the inserter.
Even on the four-switch, I found the tool helpful anyway since I could use it to make sure the mod was firmly pressed into the 2600. (The inserter will straddle the TIA if you let go of the button on top, so you're only pressing down on the socket, and not the chip.)
 ..
..
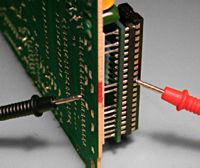
It took me more than a few attempts to get the mod to seat all of the way. In fact, I had the 2600 reassembled a couple of times only to discover it would stop working when the mod would pop back out. The filing took care of this for the most part, but to be absolutely certain, I used a multimeter to test for continuity. The one I have beeps if there's an electrical connection between the two probes, so I put one on the TIA, and one under the 2600, and tested every pin. This way I could be sure everything was seated properly. One corner gave me problems several times, before I was able to get it to stay put.
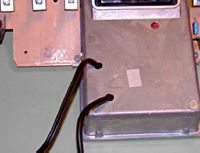
Once I had everything put back together and working, I ran into another issue. The cables were too thick to reassemble the 2600. The top of the case lies directly on top of the shield, so there was a bulge in the top of the 2600 where the wires didn't clear. While not a major problem, I didn't want the wires getting pinched, and didn't want a lumpy 2600 either.
On the four-switch, this isn't an issue because it has a different layout. For one thing, you can't (and don't need to) put the top of the shield back on, so the wires can go anywhere.
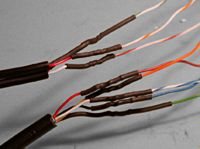
My solution on the six-switch was to run thin, individual wires from the mod and splice them to the cables. I pulled apart a cat 5 ethernet cable, and used the wires from it. Then I was able to lie the wires flat, side-by-side, across the top of the shield. Then I just held them down with some electrical tape and reassembled the 2600.
 ..
..
After getting the mod installed, and running the first set of tests, I found I needed to adjust the saturation of it. You may or may not need to, but I've detailed the why and how of it on this page.
All in all, it took more effort than I anticipated to get this mod installed. But it was still easier than any of the other mods, and worth the results in the end. Hopefully my experiences will help ease other peoples' installations a bit.